Protect Your Forms: How to Set Up Google reCAPTCHA v3 in EchoBrain
Spam submissions are one of those problems that seem minor until they’re not — fake entries, junk data, and notifications that lead nowhere. EchoBrain lets you enable Google reCAPTCHA v3 on your forms in just a few steps. Unlike the older v2 checkbox, reCAPTCHA v3 runs invisibly in the background and scores each submission, so your visitors never have to click an “I’m not a robot” box. This guide walks you through the whole process from scratch, including how to add the script directly to your Fourthwall site.
Step 1: Create Your reCAPTCHA in Google Admin Console
Before configuring anything in EchoBrain, you need to generate your reCAPTCHA keys directly from Google.
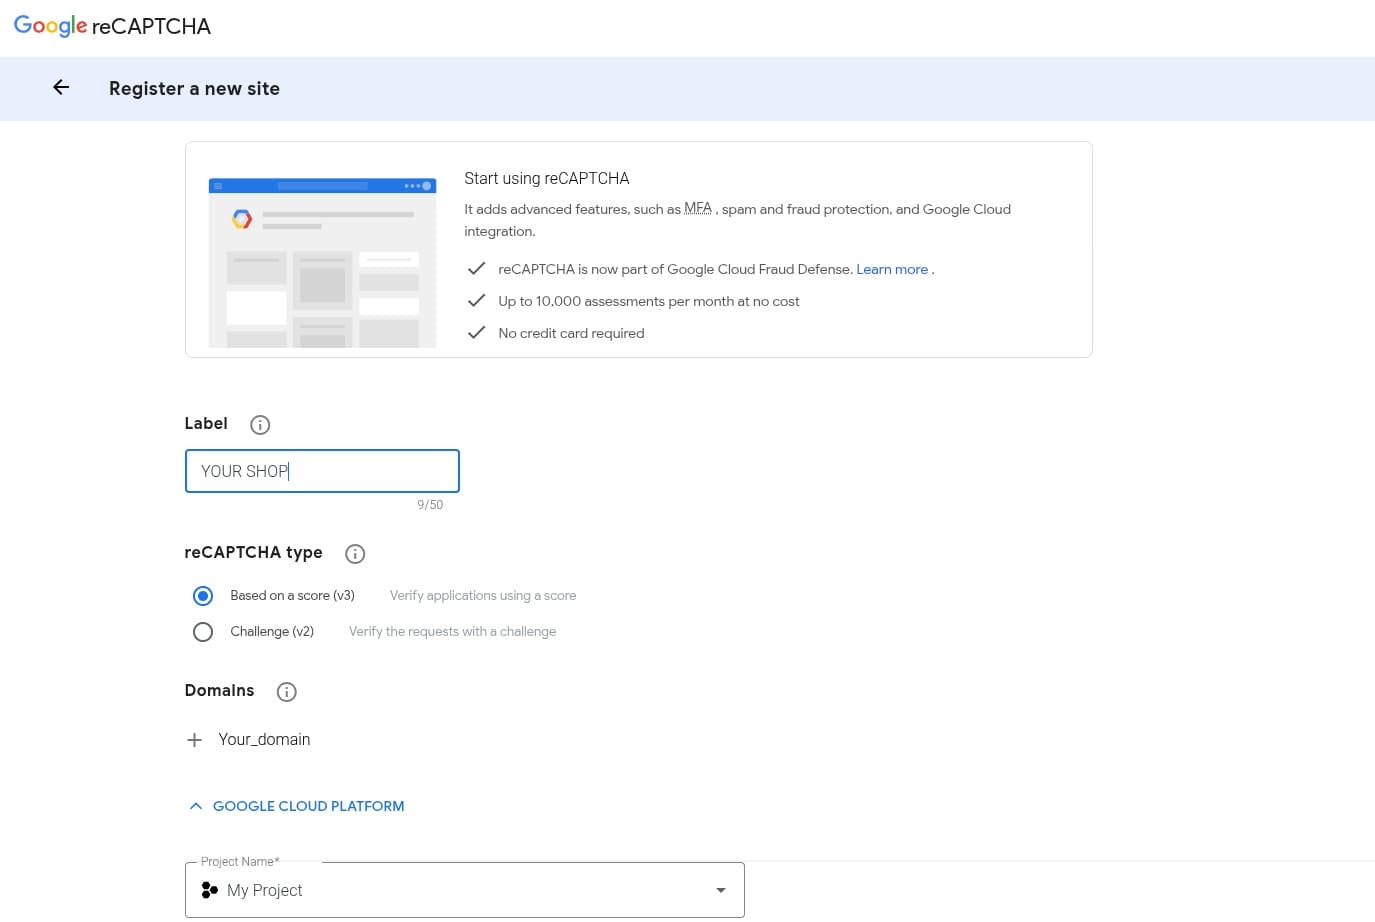
- Open the Google reCAPTCHA Admin Console in your browser. Sign in with your Google account if prompted.
-
Fill out the registration form with the following details:
- Label: enter a descriptive name to identify this reCAPTCHA (e.g.
Contact Form - My Shop). - reCAPTCHA type: select reCAPTCHA v3.
- Domains: add your website’s domain (e.g.
myshop.com).
- Label: enter a descriptive name to identify this reCAPTCHA (e.g.
-
Accept the Terms of Service and click Submit.
Step 2: Copy Your Secret Key
After submitting, Google will display two keys:
- Site Key: used on the frontend — in your form’s HTML to load the reCAPTCHA script.
- Secret Key: used on the backend to verify responses. This is the key you need to copy for EchoBrain.
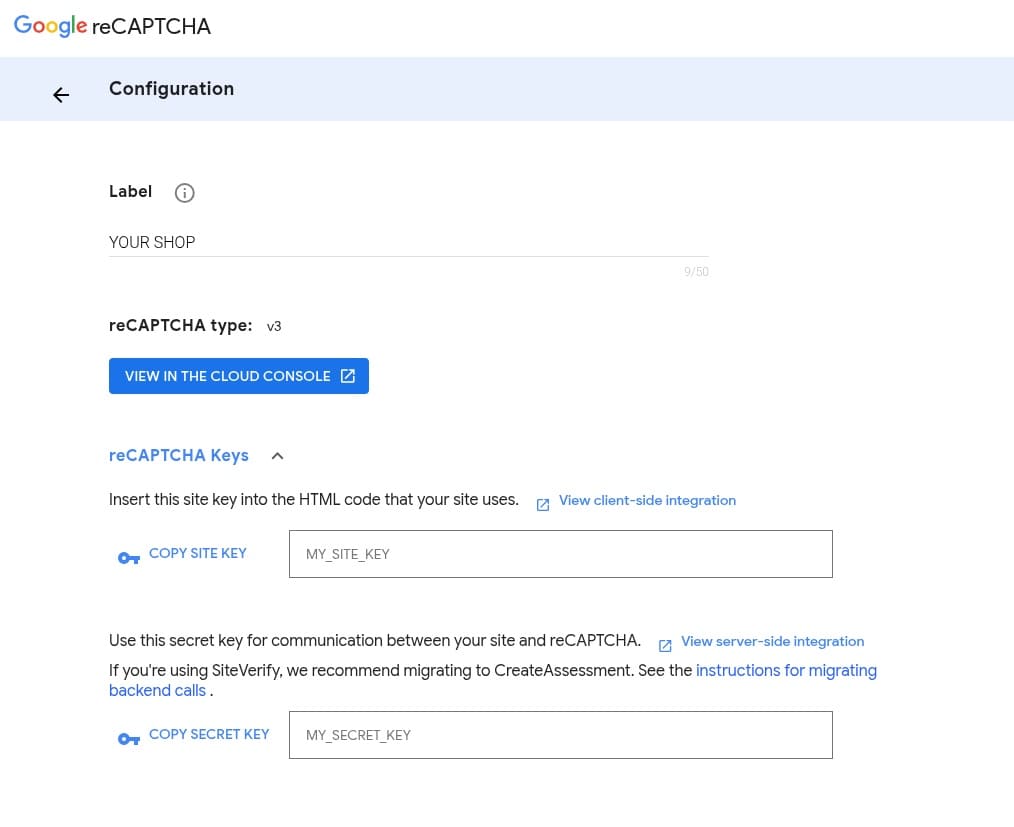
Copy the Secret Key and keep it somewhere safe. You’ll need it in the next step.
Step 3: Enable reCAPTCHA on Your EchoBrain Form
With your Secret Key ready, it’s time to configure the protection in EchoBrain.
- Log in to your EchoBrain account and go to the admin panel.
- In the left-side menu, click on Forms, then open the form you want to protect.
- In the Spam Control panel, open the “Anti-spam Protection” dropdown and select Google reCAPTCHA v3.
- Paste your Site Key and Secret Key — from Steps 1 and 2 — into their respective fields.
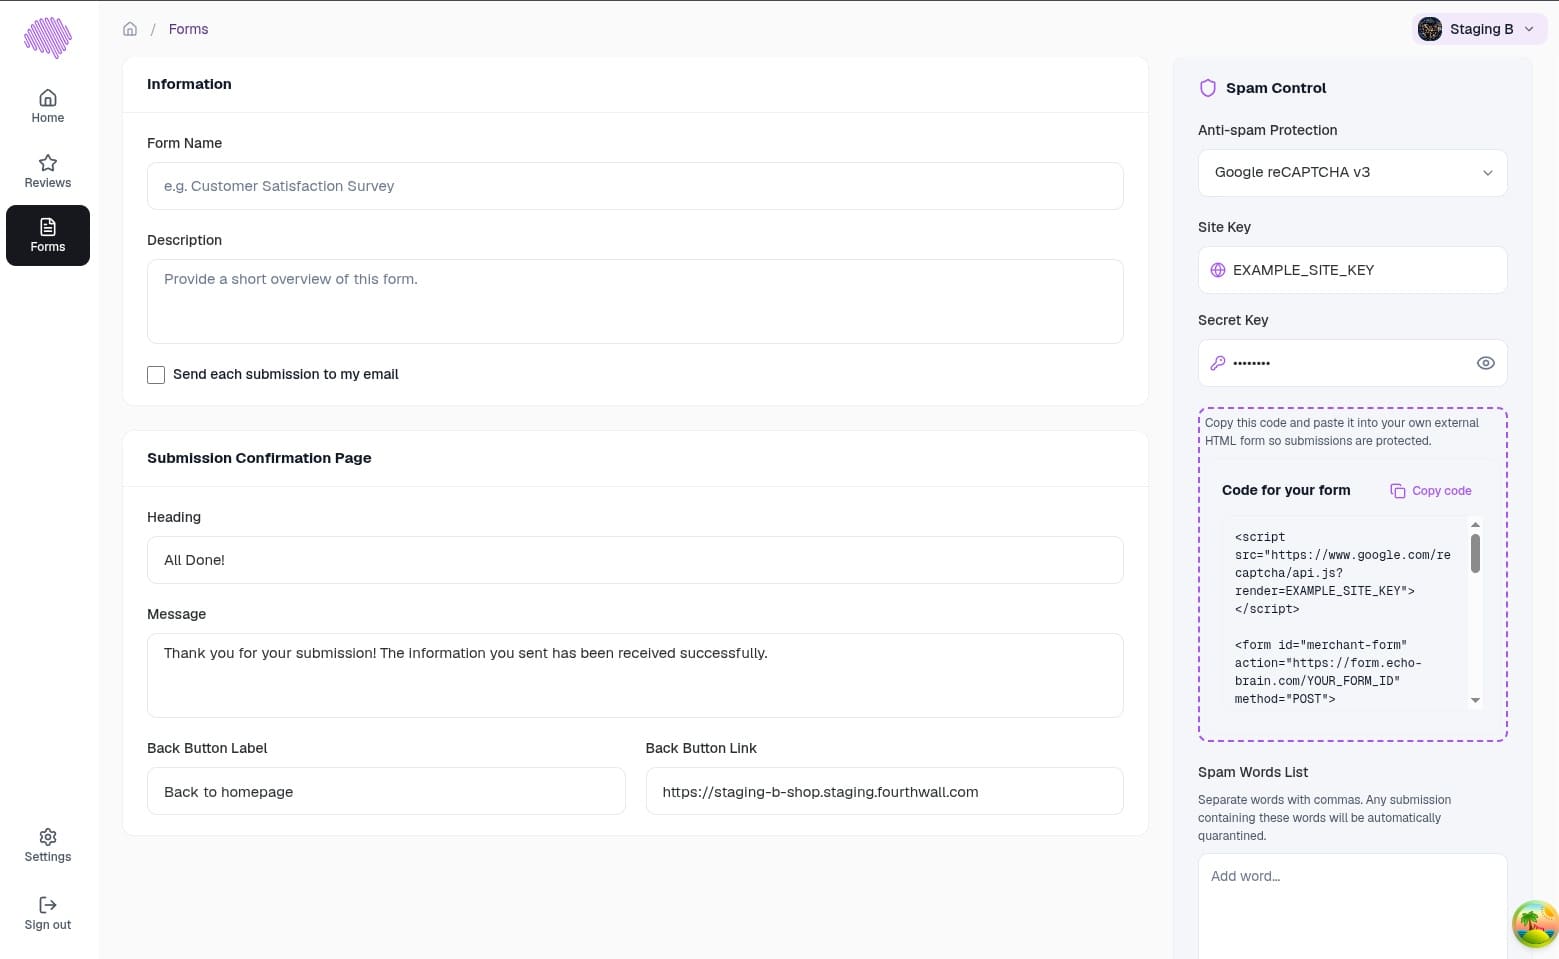
- Click Save to apply your changes.
That’s it! EchoBrain will now automatically verify every submission on that form against Google’s reCAPTCHA service before processing it, scoring how likely each submission is to be a bot.
Step 4: Add the Generated Code to Your Fourthwall Form
Once you’ve saved your Site Key and Secret Key, EchoBrain generates a ready-to-use code snippet for you in the same Spam Control panel, under “Code for your form” — with your real Site Key already baked in, no placeholders to swap out. Click Copy code to copy it.
- Log in to your Fourthwall dashboard.
- Go to Site Design in the left-side menu.
- Locate the page section that contains your form’s Custom HTML and click on it to edit it.
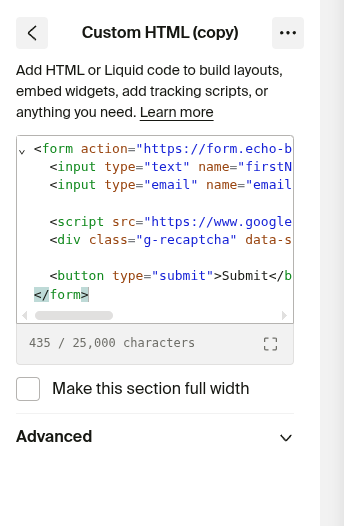
- Paste the code EchoBrain gave you in place of (or alongside) your existing form HTML, keeping your own fields inside the
<form>element. - Click Save to publish your changes.
Your form is now fully protected. Visitors won’t see any challenge at all — reCAPTCHA v3 runs silently and EchoBrain verifies the score on the backend using your Secret Key.
Conclusion
Enabling Google reCAPTCHA v3 on your EchoBrain forms is a four-step process: create your keys in Google, copy the Secret Key, configure it in EchoBrain, and add the script to your Fourthwall form. In just a few minutes you’ll have an extra, invisible layer of protection keeping your submissions clean and reliable — without adding friction for real visitors.
Have questions? Reach out to support. And if you haven’t set up your forms yet, check out our custom forms guide to get started from scratch. Prefer a zero-setup option instead? See our Honeypot guide.
Ready to protect your forms? Log in to EchoBrain today and enable spam protection in minutes.