Forms: Adding custom forms to your shop
Building a strong connection with your customers starts with understanding their needs and preferences. One way to achieve this is through custom forms, which can collect valuable information for a tailored experience on your ecommerce site. If you’re using the EchoBrain app, this guide will walk you through creating and customizing forms to suit your business needs.
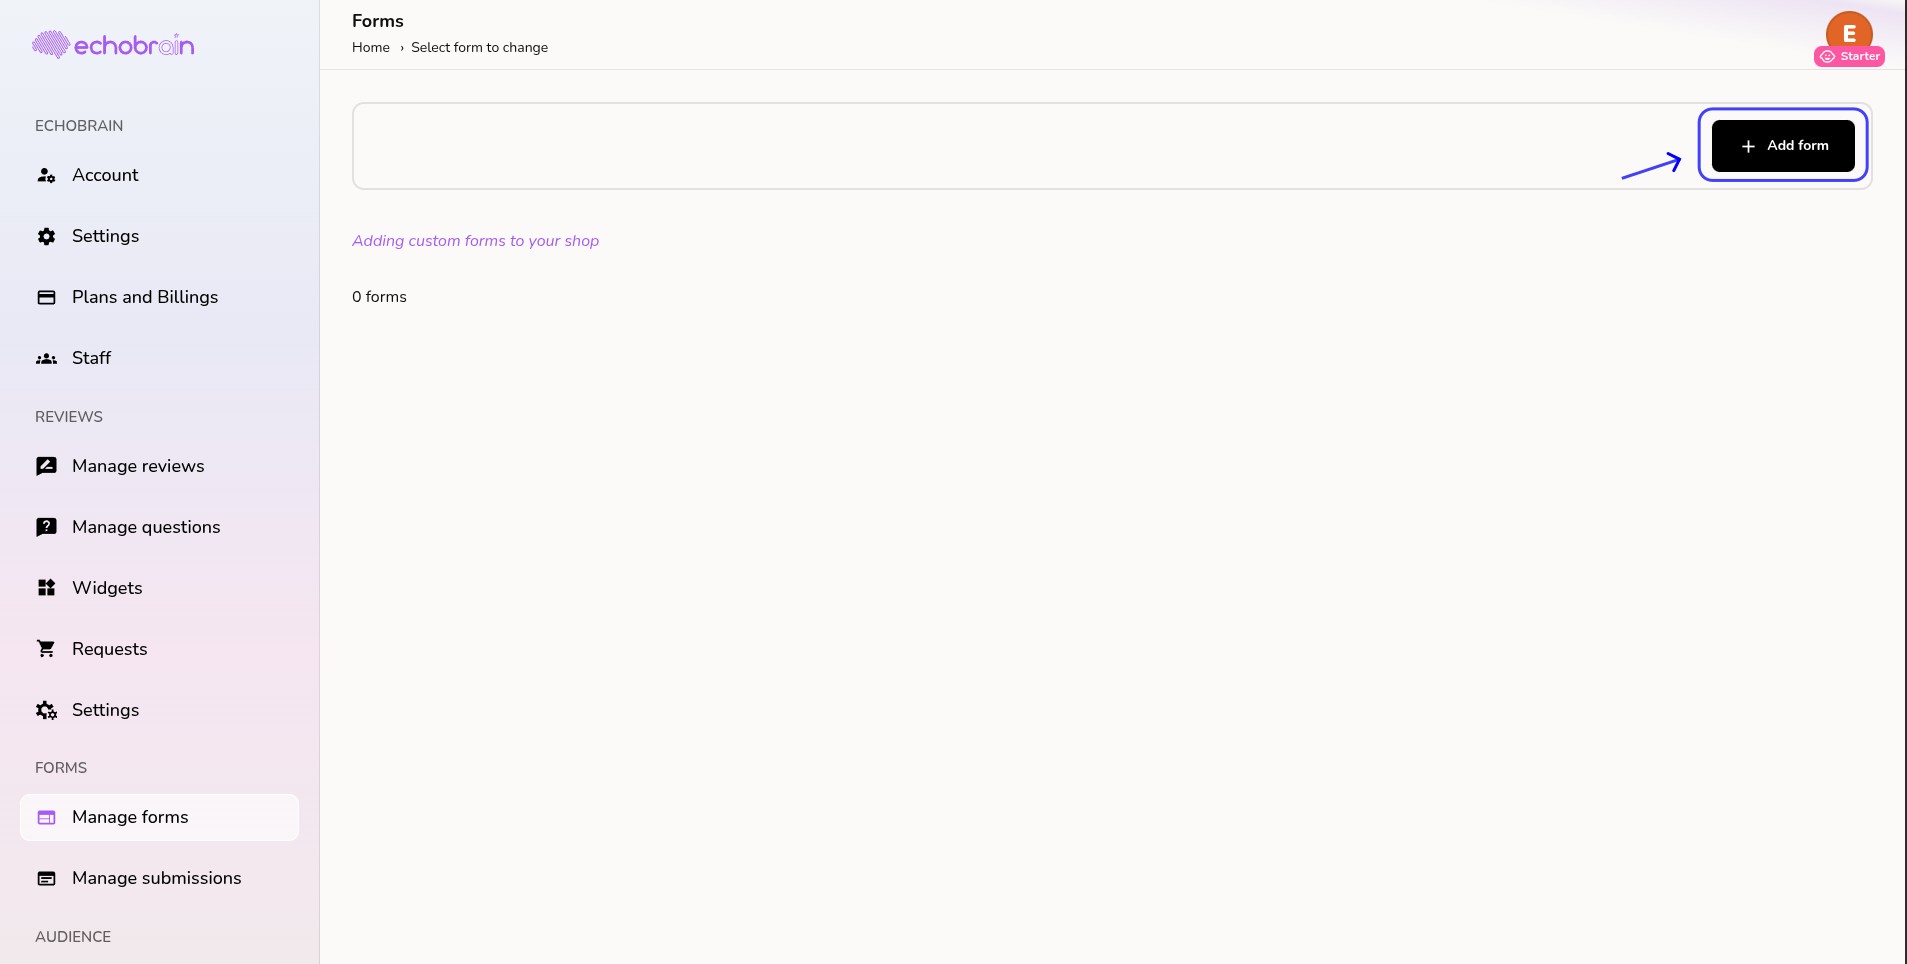
Navigating to the Forms Dashboard
After logging into your EchoBrain account, you’ll find yourself on the main dashboard, where you can manage various aspects of your store. To start working with forms, look to the left-side bar and click on Forms under the “Forms” section. This will take you to the Forms page, where you can see any existing forms and manage submissions.
Step-by-Step: Creating a New Form
1. Click on “Add Form +”: On the Forms page, you will see the option to add a new form in the upper-right corner. Click on the “Add Form +” button to create a new form. You’ll be directed to a page where you can set up the details of your form.
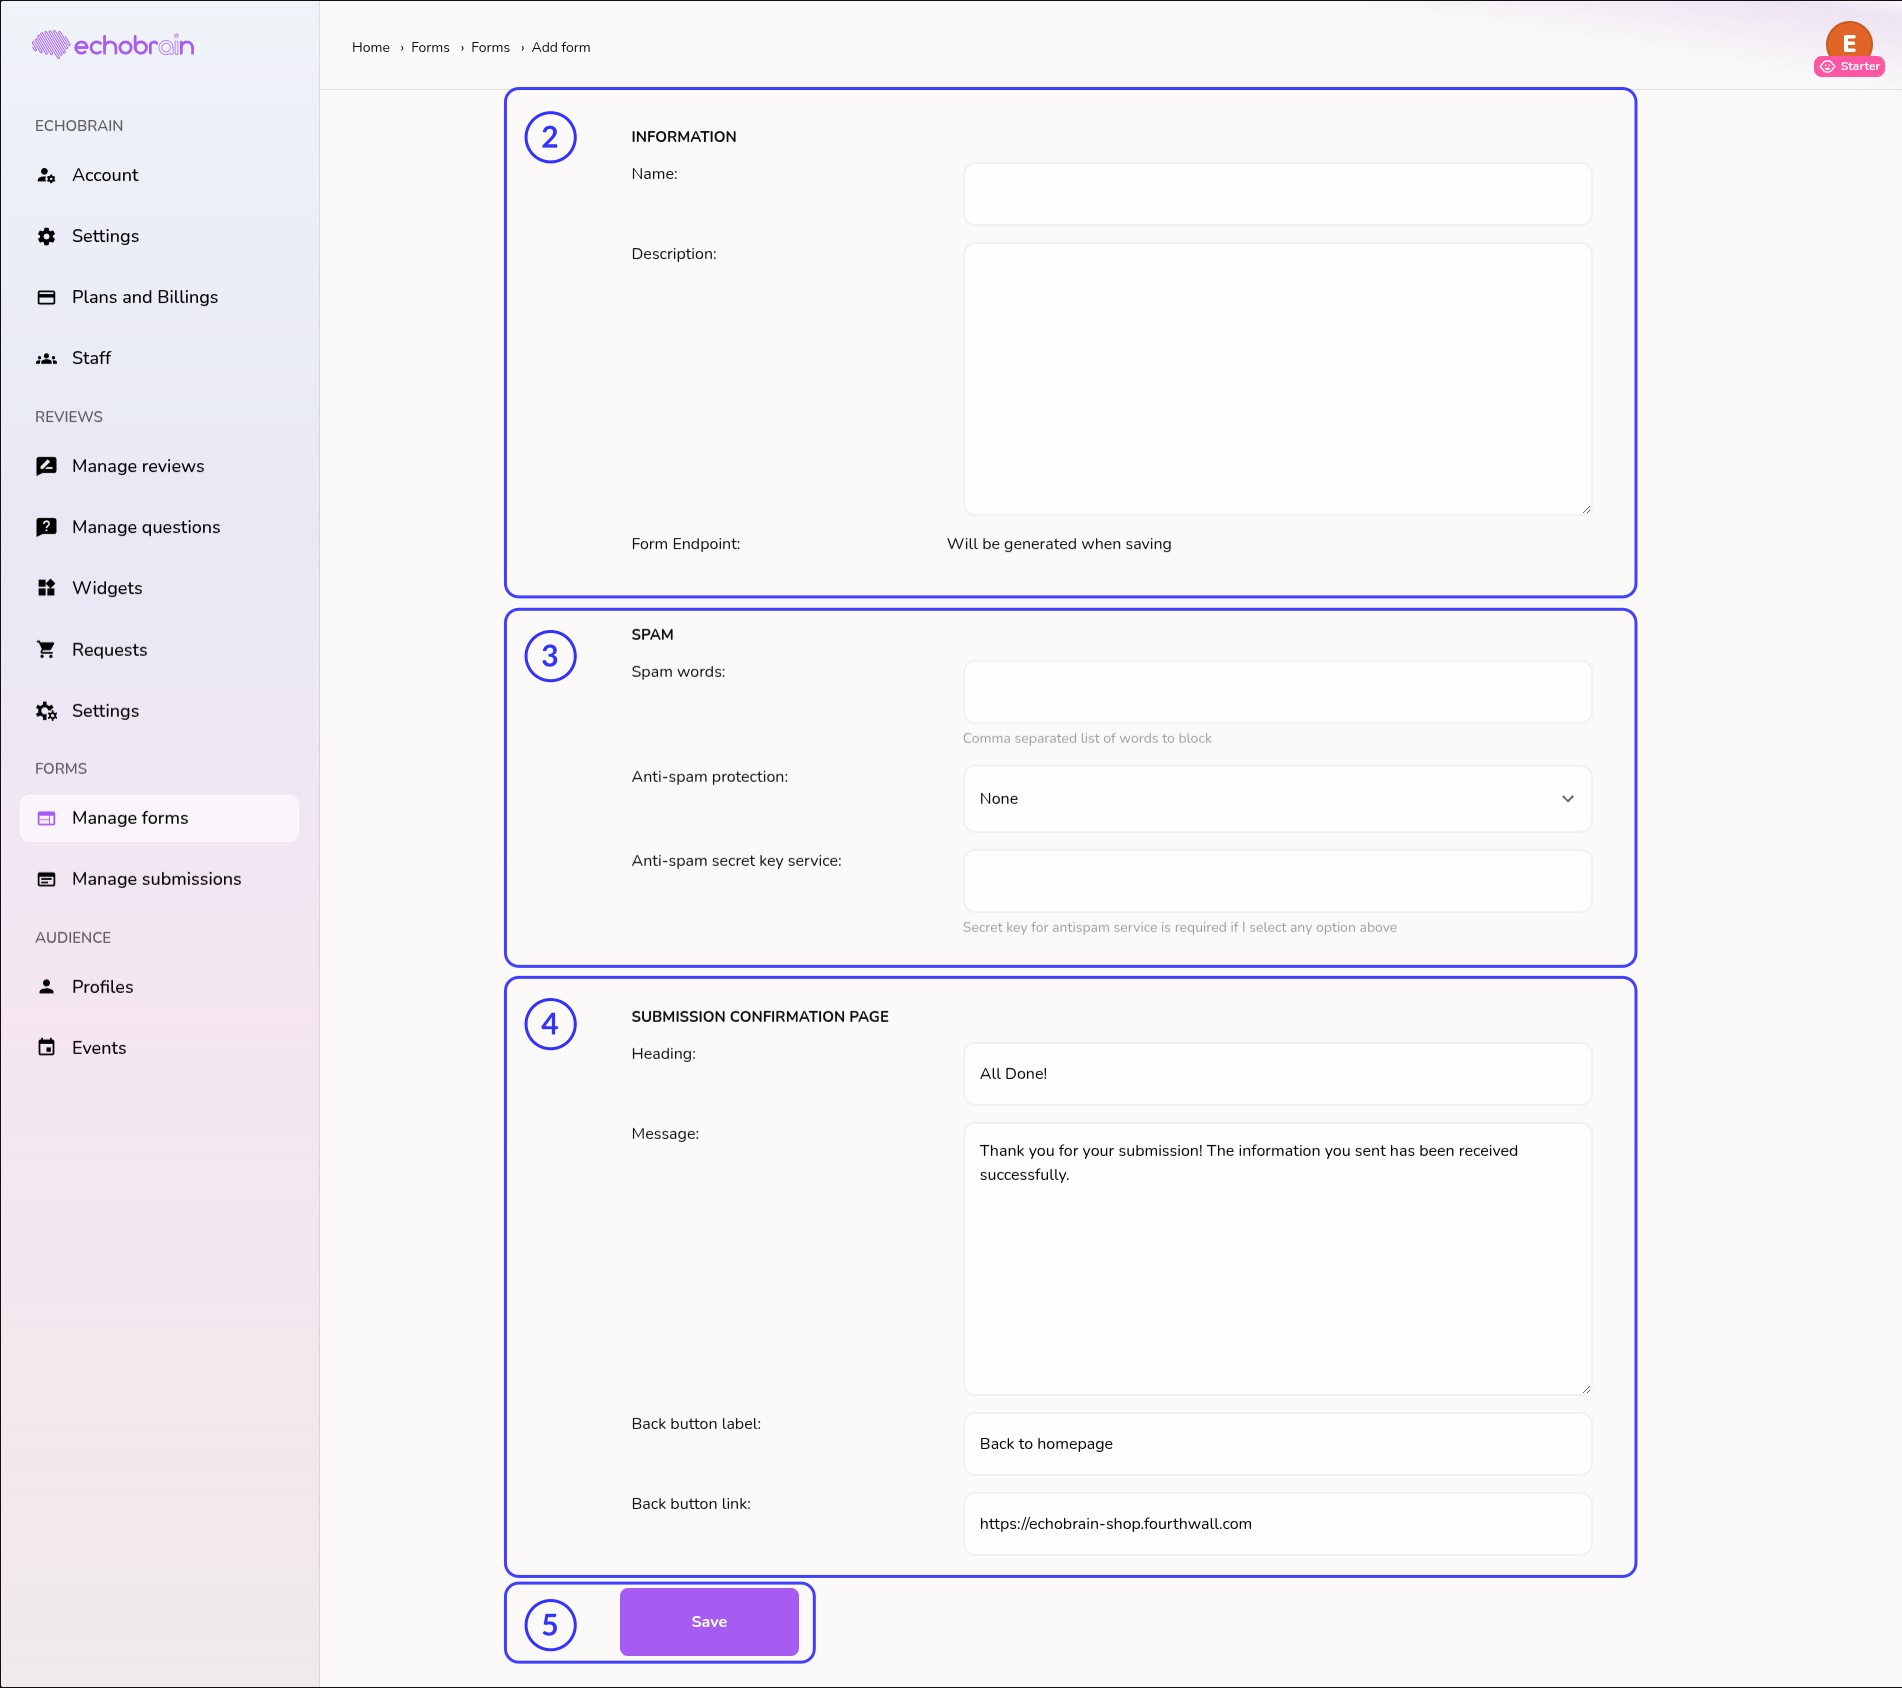
2. Fill Out the Form Information: On this screen, you’ll need to provide a Name for your form, and it’s optional to include a Description. The description can give context for what the form will be used for, such as “Sign up for our newsletter” or “Submit your product review.”
3. Spam Protection: You’ll also notice fields for spam protection. Here you can input a list of blocked words, select an anti-spam protection level, and, if necessary, enter the secret key for the anti-spam service you choose to use. Though optional, enabling spam protection can help keep your submissions clean and relevant.
4. Submission Confirmation Page: Define the message displayed to visitors after a successful form submission. Note that these forms support Fetch and AJAX requests via JavaScript — if you prefer to show a custom confirmation message programmatically, you can handle it entirely in JS and skip configuring this section.
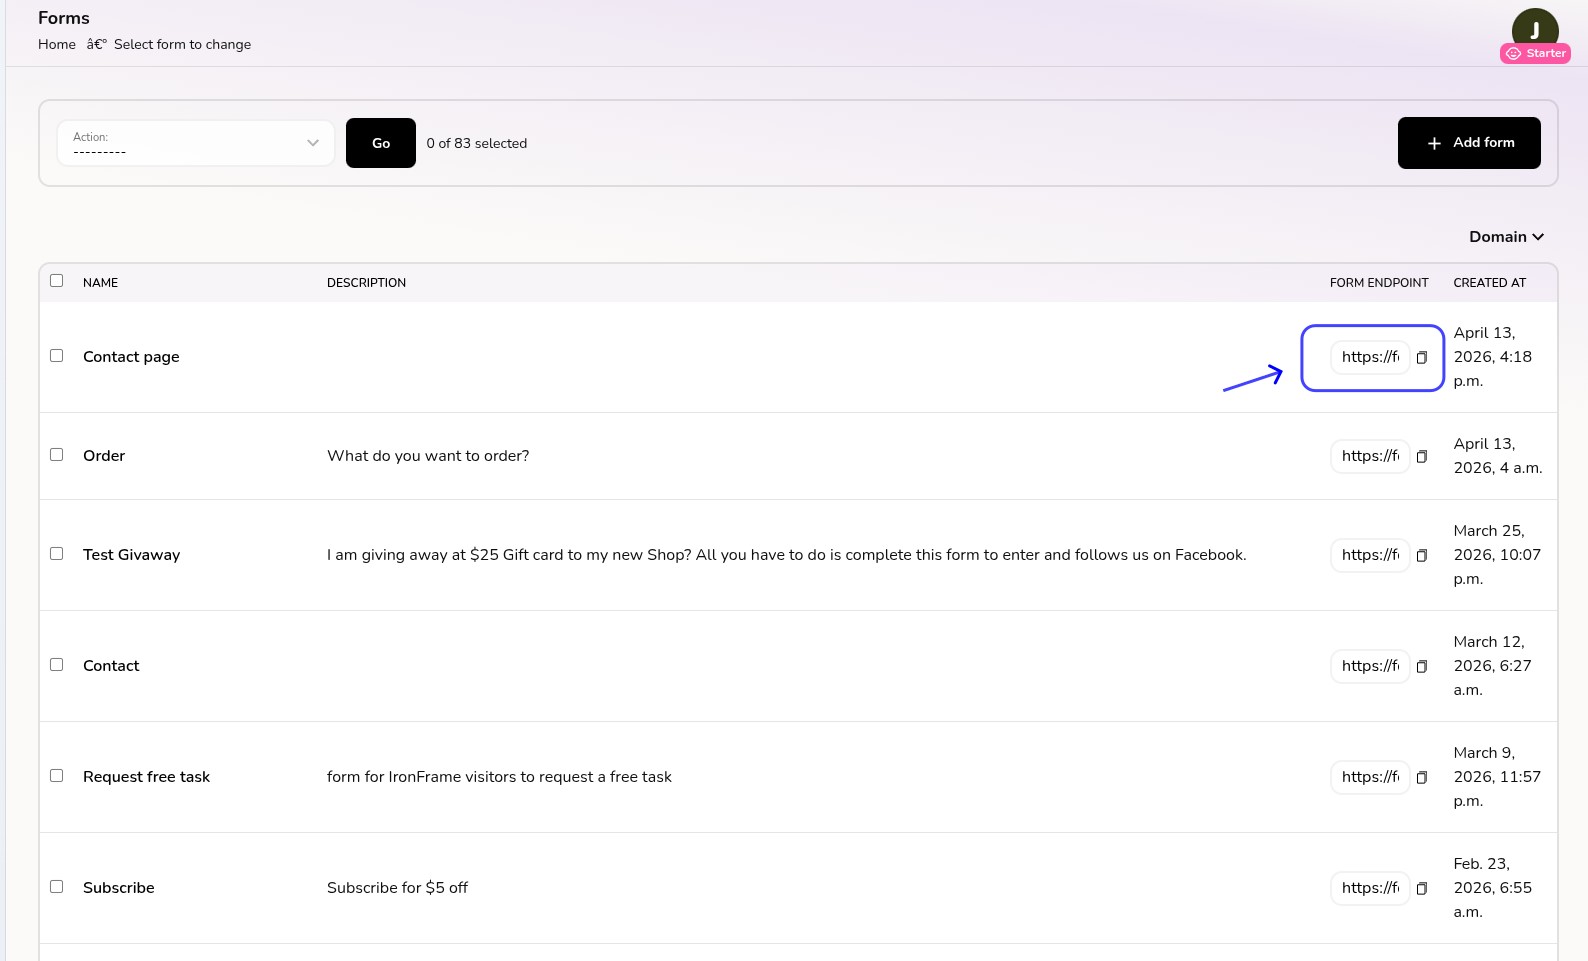
5. Save and Get the Form Endpoint: Once all necessary fields are filled out, click the Save button. A Form Endpoint will be generated upon saving. This endpoint is crucial, as it’s where you will direct all form submissions.
Once saved, copy the Form Endpoint to use it on your website. This is the URL where form data will be sent when visitors complete and submit your form — make sure to copy it accurately, as it is essential for your form to work correctly.
Using the Form Endpoint
Once you have your Form Endpoint, you’re ready to integrate the form into your website. Here’s how you can implement it using HTML or Javascript.
HTML Form Submission
If you’re using an HTML form, you’ll need to set the action attribute of your <form> element to the generated Form Endpoint. For example:
<form action="https://form.echo-brain.com/your-form-endpoint" method="POST" enctype="multipart/form-data">
  <input type="text" name="firstName" placeholder="First Name" required>
  <input type="text" name="lastName" placeholder="Last Name" required>
  <input type="email" name="email" placeholder="Email" required>
  <button type="submit">Submit</button>
</form>
In this case, the fields should always have a name attribute, as this is required for sending the data correctly to the Form Endpoint.
Example Implementation on Fourthwall
Sample Contact Message Form:
  <div class="wrapper container">
    <h2>Contact Us</h2>

    <form
      action="https://form.echo-brain.com/your-form-endpoint"
      method="POST"
      enctype="multipart/form-data"
      class="form"
    >
      <div class="form__section">
        <div data-input="container" class="input-field input-field--base">
          <input
            id="email"
            name="email"
            type="email"
            data-input="input"
            class="input-field__input"
            placeholder="Email"
            required
          >
          <label for="email" class="input-field__label">Email</label>
        </div>
      </div>

      <div class="form__section">
        <div data-input="container" class="input-field input-field--textarea">
          <textarea
            id="message"
            name="message"
            data-input="input"
            rows="3"
            class="input-field__input"
            placeholder="Message"
            required
          ></textarea>
          <label for="message" class="input-field__label">Message</label>
        </div>
      </div>

      <button type="submit" class="button button--primary button--large button--expand">
        Submit
      </button>
    </form>
  </div>
Sample Subscription Form:
<div class="wrapper container">
  <h2>Contact Form</h2>

  <form
    action="https://form.echo-brain.com/your-form-endpoint"
    method="POST"
    enctype="multipart/form-data"
    class="form"
  >
    <div class="form__section">
      <div data-input="container" class="input-field input-field--base">
        <input
          id="first-name"
          name="firstName"
          type="text"
          data-input="input"
          class="input-field__input"
          placeholder="First Name"
          required
        >
        <label for="first-name" class="input-field__label">First Name</label>
      </div>
    </div>

    <div class="form__section">
      <div data-input="container" class="input-field input-field--base">
        <input
          id="last-name"
          name="lastName"
          type="text"
          data-input="input"
          class="input-field__input"
          placeholder="Last Name"
          required
        >
        <label for="last-name" class="input-field__label">Last Name</label>
      </div>
    </div>

    <div class="form__section">
      <div data-input="container" class="input-field input-field--base">
        <input
          id="email"
          name="email"
          type="email"
          data-input="input"
          class="input-field__input"
          placeholder="Email"
          required
        >
        <label for="email" class="input-field__label">Email</label>
      </div>
    </div>

    <button type="submit" class="button button--primary button--large button--expand">
      Submit
    </button>
  </form>
</div>
Implementing Forms on Fourthwall
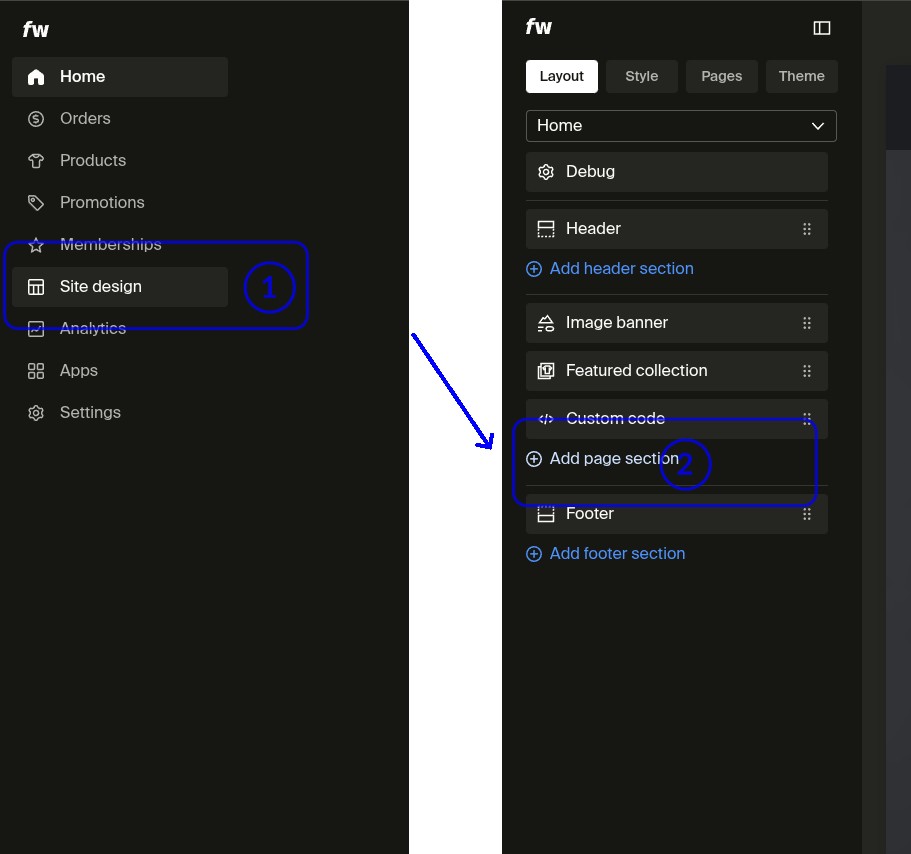
To implement a custom form in Fourthwall using Site Design, follow these steps:
- Go to Site Design in your Fourthwall dashboard
- Click Add page section
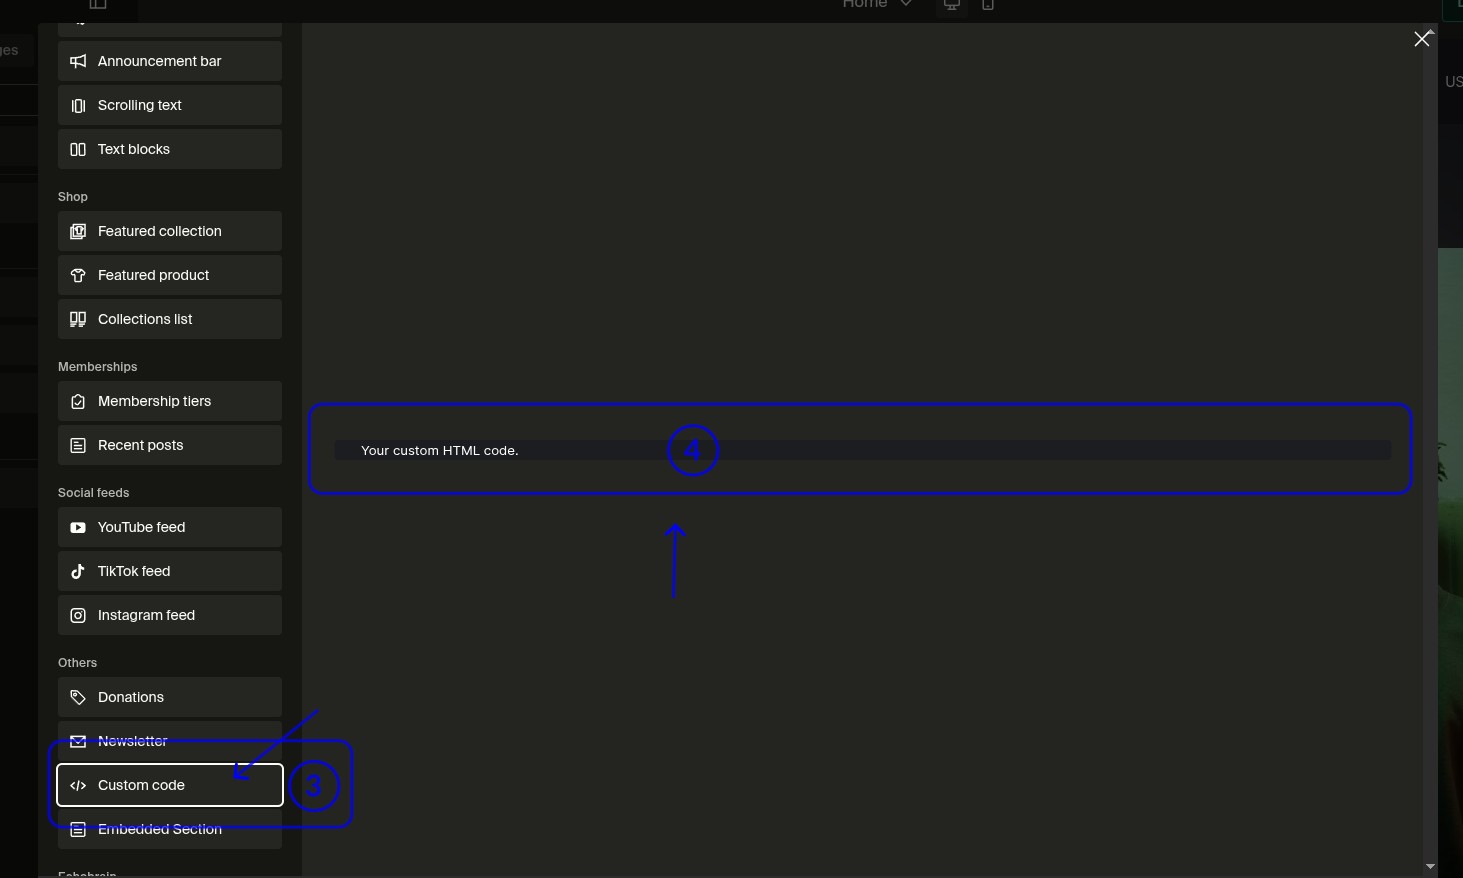
- A modal with available sections will appear. Look for the Custom code section
- Select the Custom code section preview
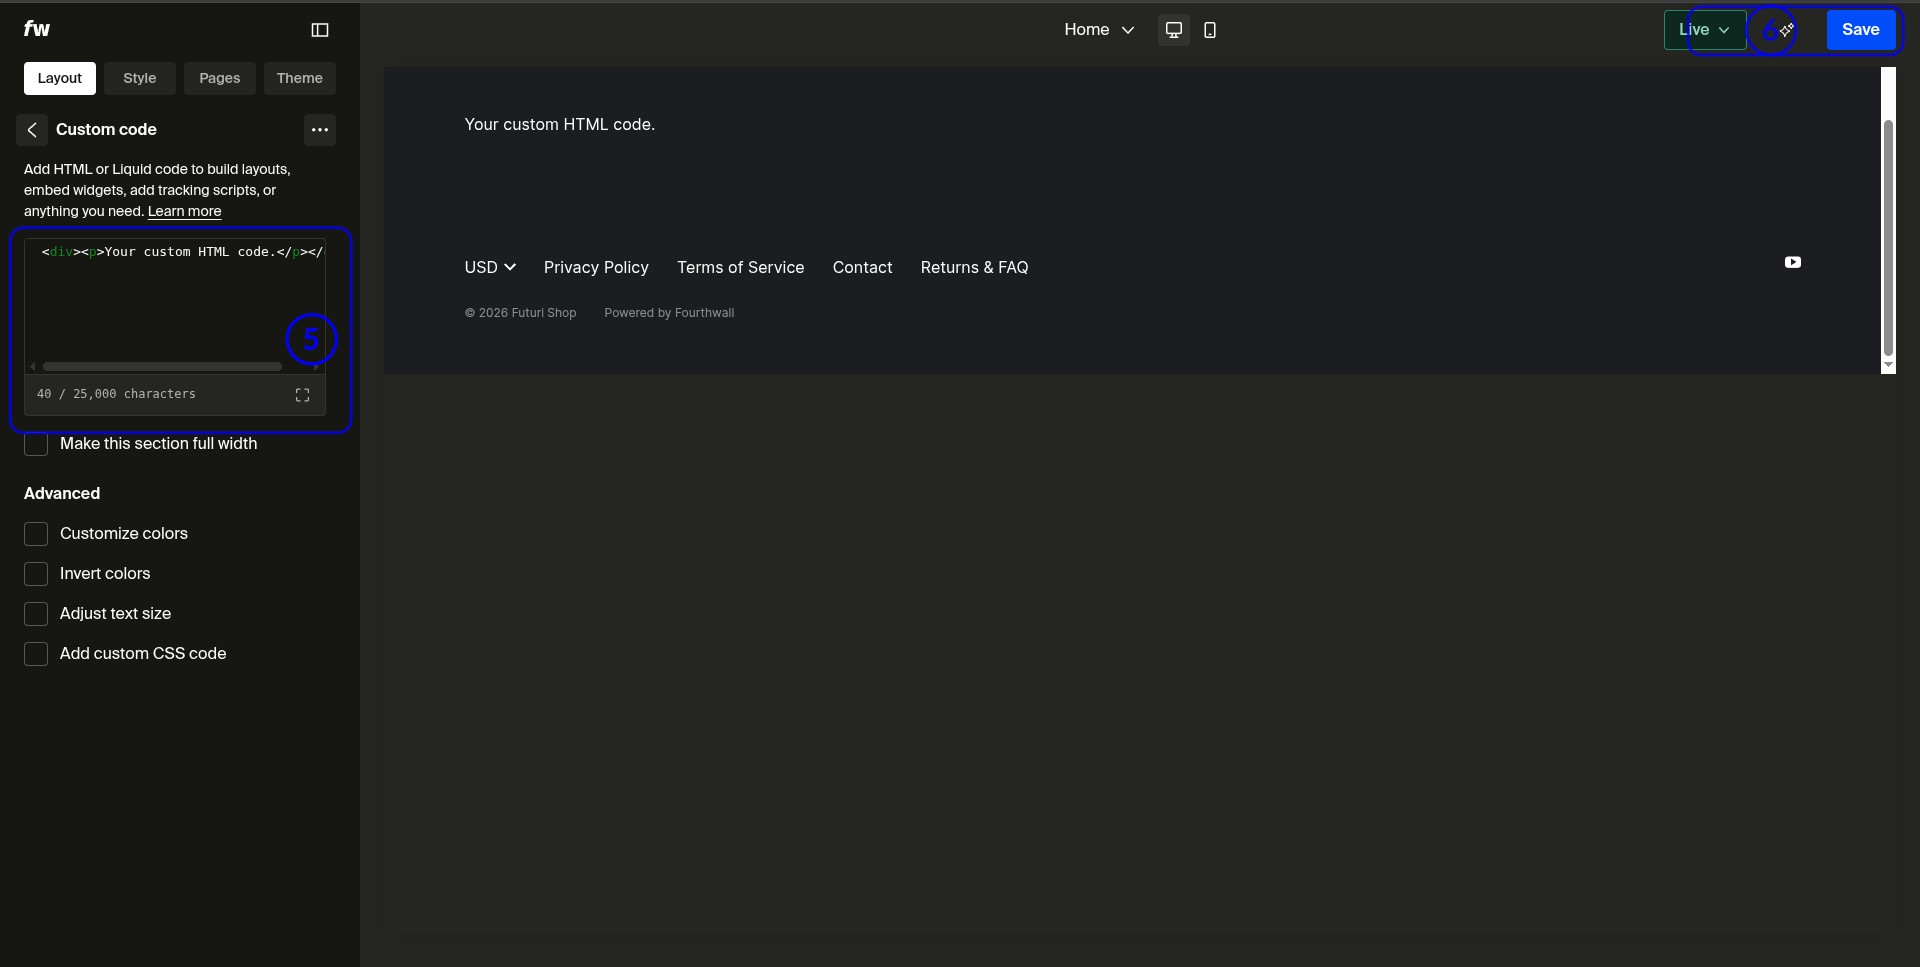
- The configuration screen will load, where you can paste your custom HTML form
- Finally, click Save to apply your changes
AJAX or Fetch Submission
For a more dynamic approach, you can use JavaScript with AJAX or the Fetch API to send form data to the Form Endpoint without reloading the page. Here’s a simple example using Fetch:
const form = document.querySelector('form');
form.addEventListener('submit', async (e) => {
  e.preventDefault();

  const formData = new FormData(form);

  const response = await fetch('https://form.echo-brain.com/your-form-endpoint', {
    method: 'POST',
    body: formData
  });

  if (response.ok) {
    console.log('Form submitted successfully');
  } else {
    console.error('Error submitting form');
  }
});
Again, ensure that each input element in your form has a name attribute to ensure the data is submitted correctly.
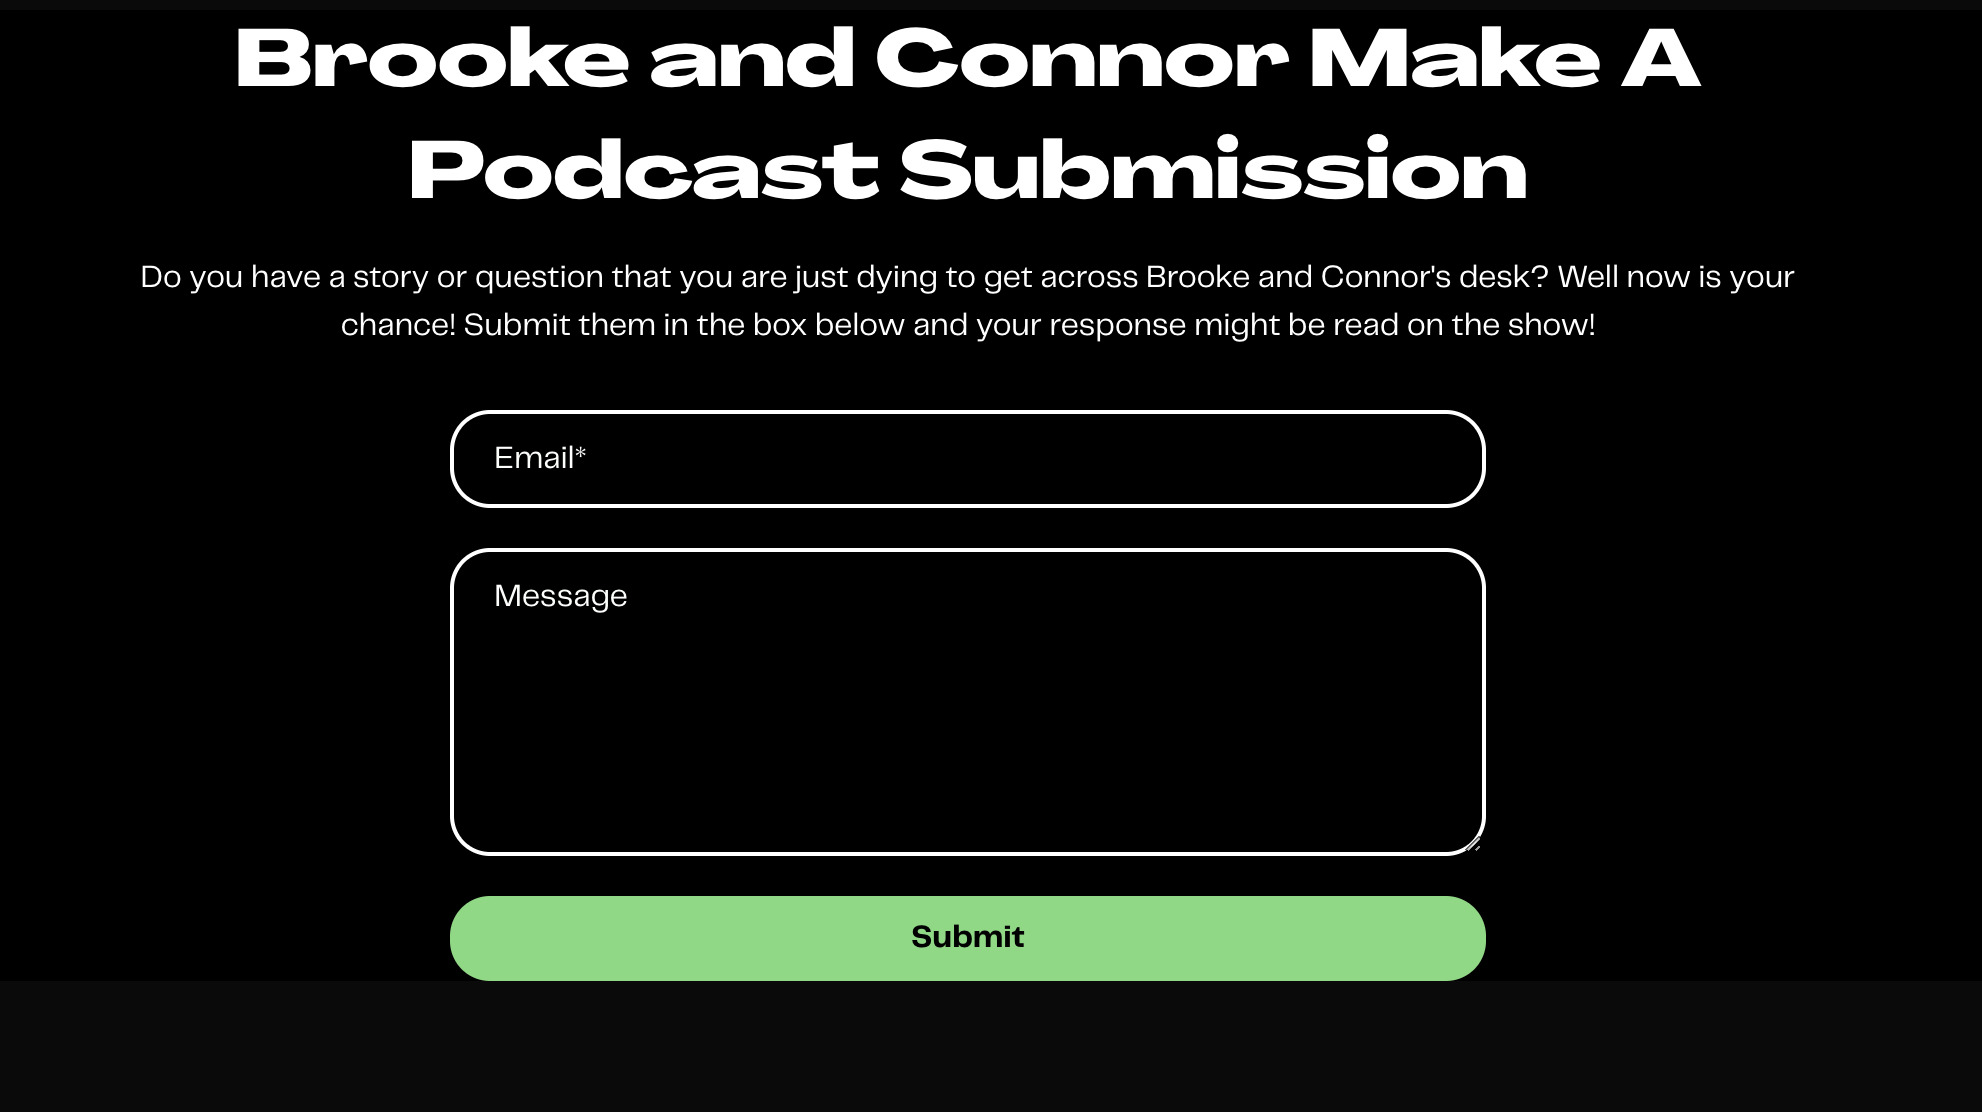
After following these steps, you should end up with a full-fledged custom form that you can use to collect all types of data from your visitors. You can even have your visitors submit images to you. All you need to do is include the correct html tags in your form.
Here are some examples of how some creators and merchants are using EchoBrain’s custom forms within their Fourthwall shops:
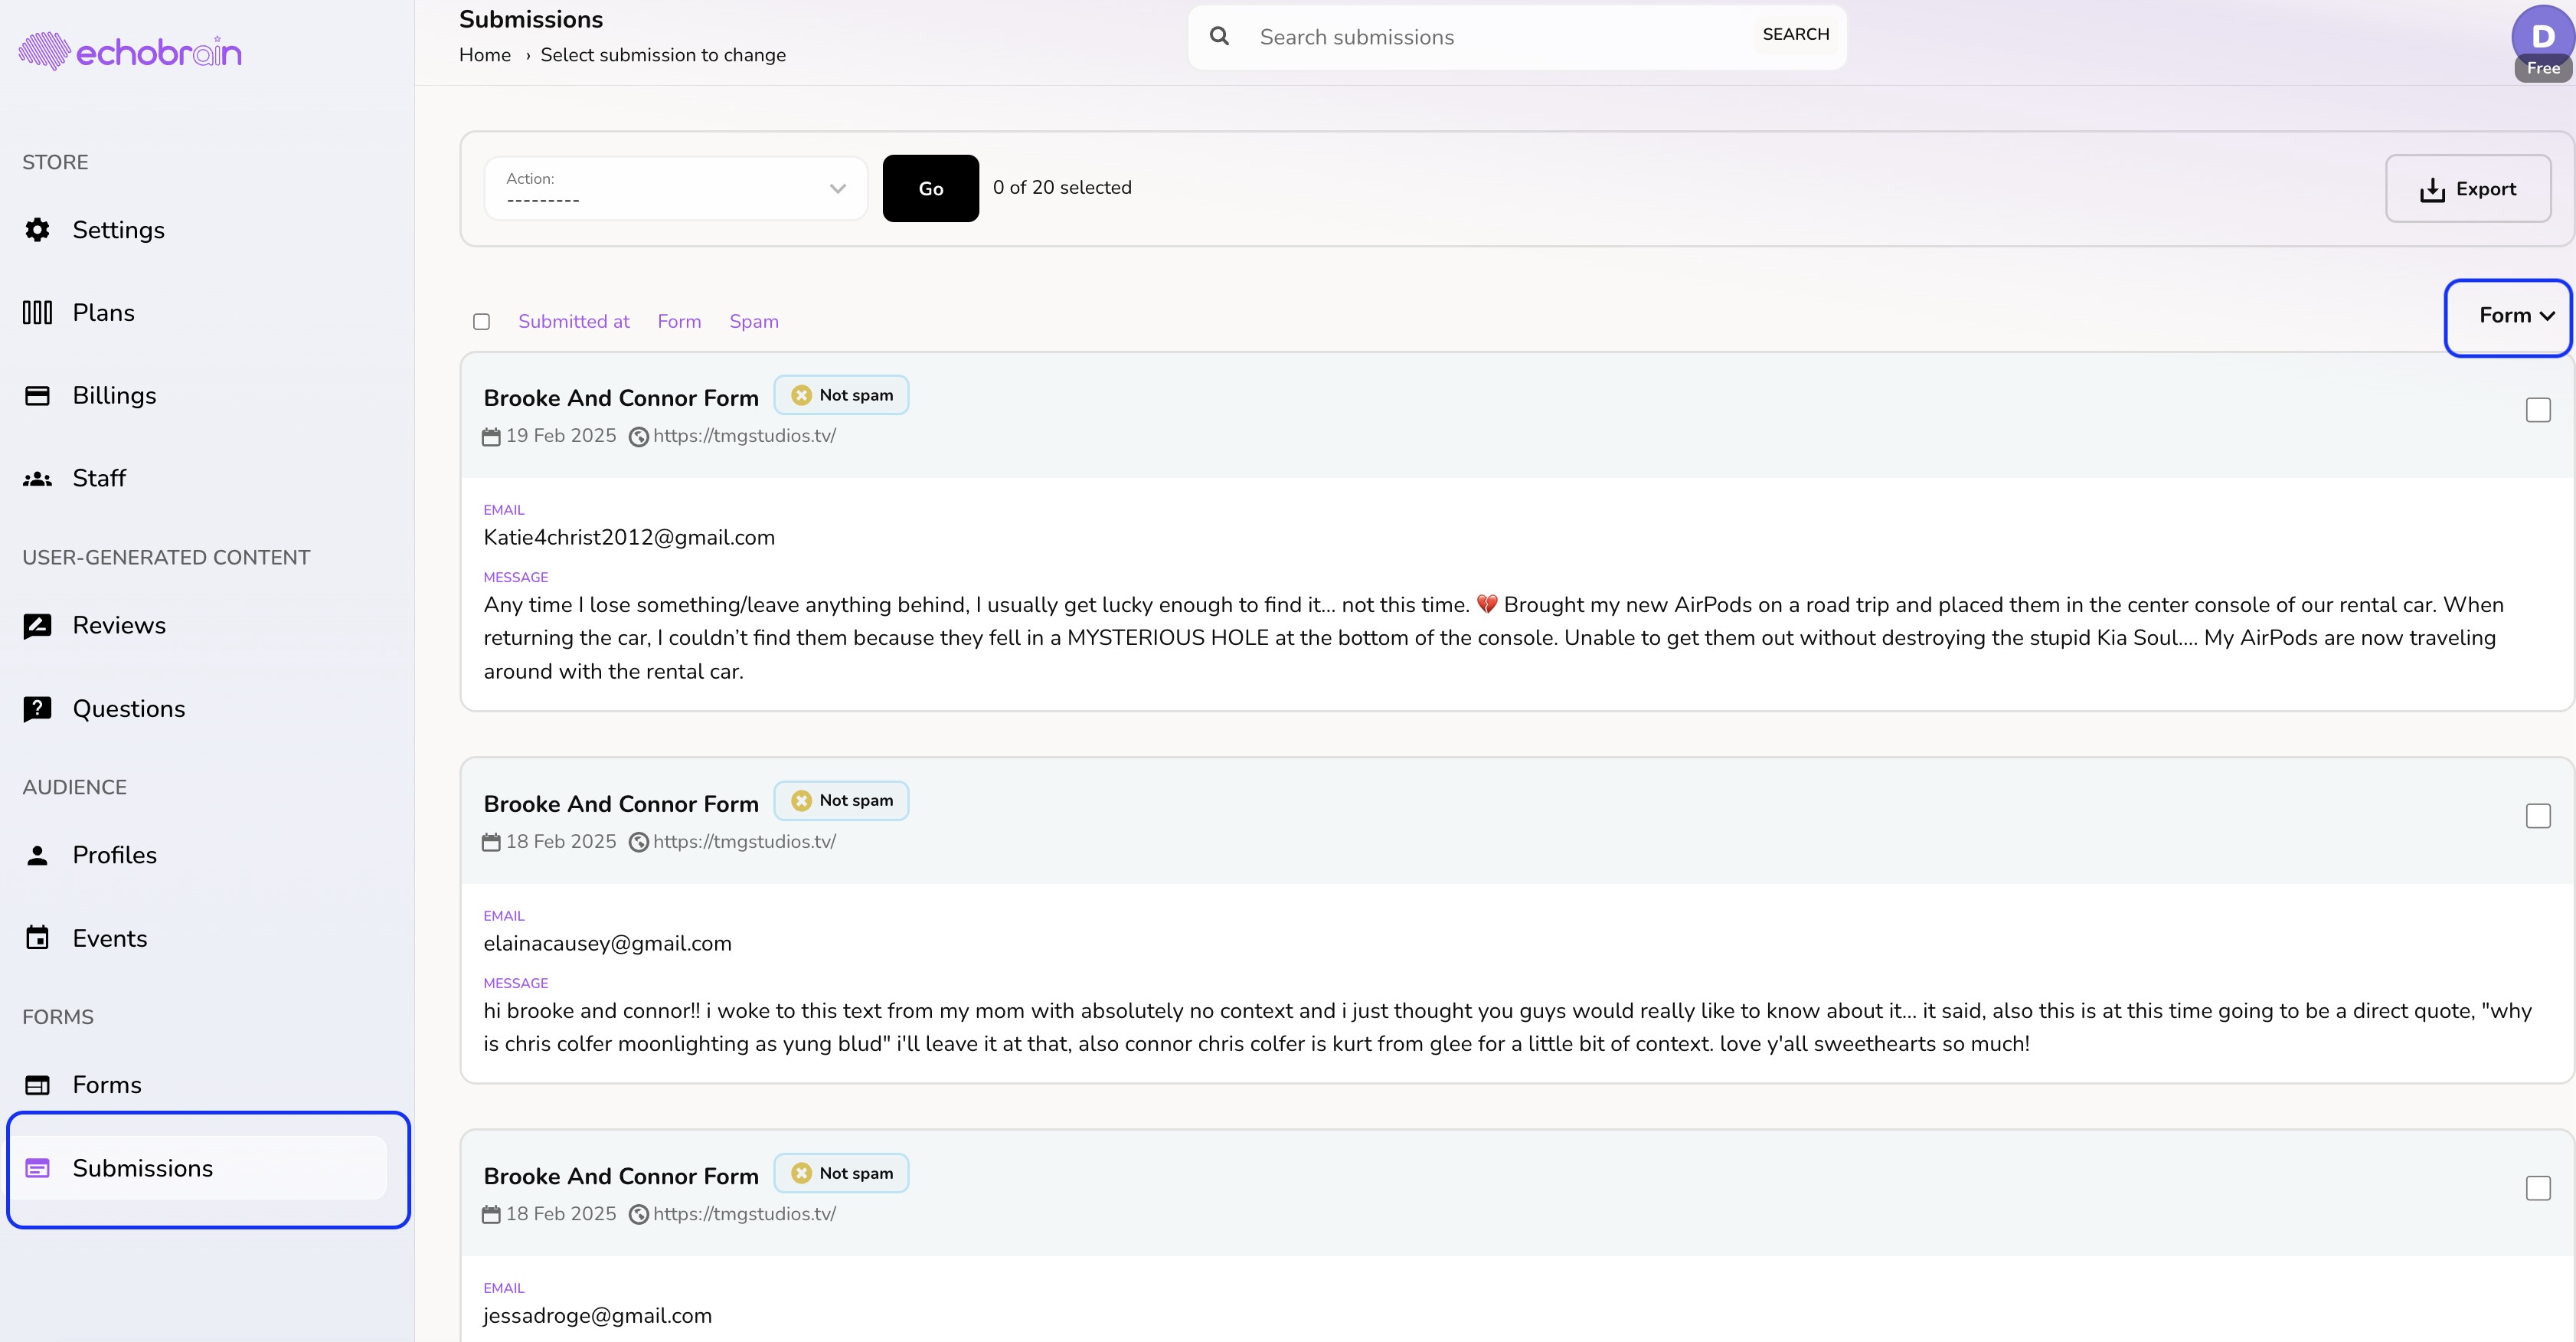
Managing Form Submissions
Once your forms are live, you can track and manage submissions directly within EchoBrain. Click on “Submissions” on the left-side bar, and you will get a list of all the submissions for all your active forms. You can filter the submissions to see only the ones for a specific form by using the dropdown filter on the top right corner of the list.
You can also delete submissions that are no longer relevant or flagged as spam. This gives you full control over your customer data, keeping your forms and customer interaction organized and efficient.
Conclusion
Creating custom forms in EchoBrain is a straightforward yet powerful way to capture meaningful customer data. By following the steps outlined in this guide, you can seamlessly integrate forms into your ecommerce shop, whether you’re collecitng newsletter sign-ups or customer feedback. Keep your audience engaged and your brand growing with EchoBrain’s flexible form functionality.
Ready to create your form? Log in to EchoBrain today and start crafting a unique experience for your customers!