Protect Your Forms: Zero-Setup Spam Protection with Honeypot
Spam submissions are frustrating — fake entries clutter your inbox, pollute your data, and waste your time. EchoBrain now offers Honeypot protection, a built-in spam filter that works silently on the backend with a single line of HTML and zero external accounts required. No third-party keys, no user-facing challenges.
This guide walks you through enabling the honeypot on your form and adding the one field it needs to your HTML.
What Is a Honeypot?
A honeypot is an invisible trap for spam bots. You add a hidden input field to your form — one that real visitors can’t see or fill in. Automated bots, however, mindlessly fill in every field they find. When EchoBrain receives a submission with that hidden field populated, it quietly marks it as spam and returns a success response — the bot has no idea it was caught, so it doesn’t retry.
The result: clean submissions from real people, junk silently filtered in the background.
Step 1: Enable Honeypot on Your EchoBrain Form
The first step is selecting Honeypot as the spam protection method for the form you want to protect.
- Log in to your EchoBrain account and open the admin panel.
- In the left-side menu, click on Forms.
- Open the form where you want to enable the honeypot — either click on an existing form to edit it, or click Add Form + to create a new one.
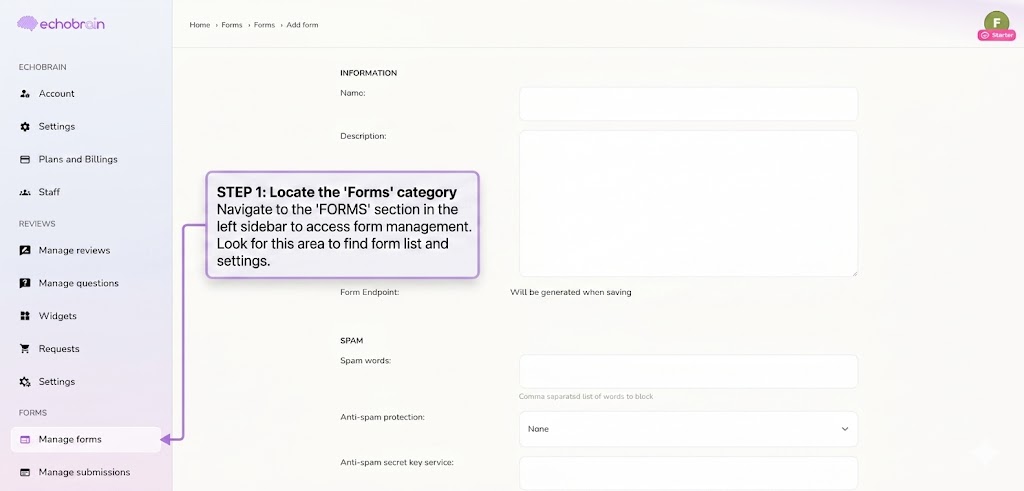
- Scroll down until you find the Spam section.
- In the “Anti-spam protection” dropdown, select Honeypot.
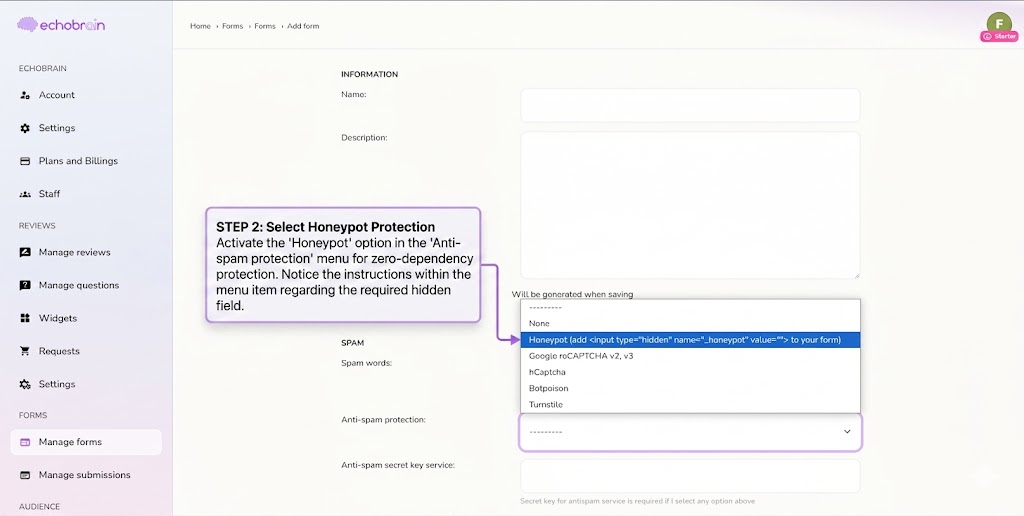
- Click Save to apply your changes.
That’s all the configuration EchoBrain needs. Now you just have to add one hidden field to your HTML form.
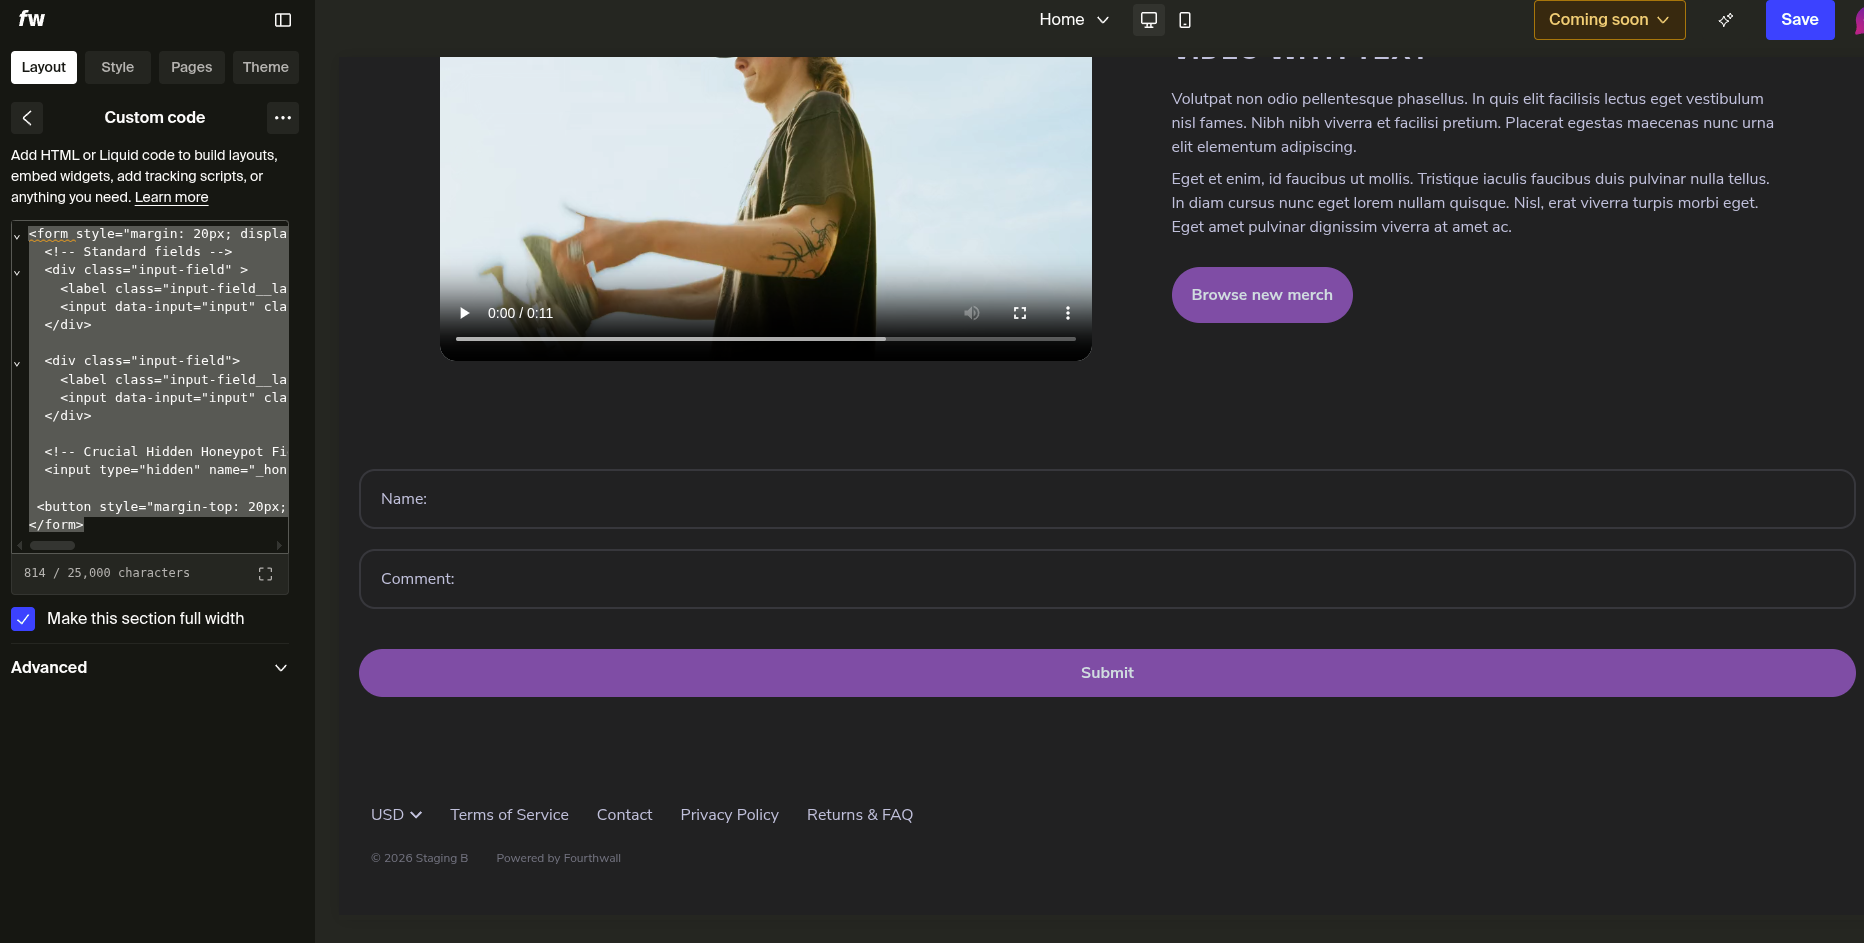
Step 2: Add the Honeypot Field to Your HTML Form
Inside your <form> element, add the following hidden input anywhere before the closing </form> tag:
<input type="hidden" name="_honeypot" value="">
Your form should look something like this:
<form style="margin: 20px; display: flex; gap: 20px; flex-direction: column;" class="grid__column" action="https://form.echo-brain.com/your-form-uuid" method="POST">
  <!-- Standard fields -->
  <div class="input-field" >
    <label class="input-field__label" for="name">Name:</label>
    <input data-input="input" class="input-field__input" type="text" id="name" name="name" required>
  </div>

  <div class="input-field">
    <label class="input-field__label" for="review">Comment:</label>
    <input data-input="input" class="input-field__input" id="review" name="review" required>
  </div>

  <!-- Crucial Hidden Honeypot Field -->
  <input type="hidden" name="_honeypot" value="">

  <button style="margin-top: 20px;" class="button button--primary" type="submit">Submit</button>
</form>
A few things to keep in mind:
- The field must be named
_honeypotexactly — EchoBrain looks for that name. - The
valueattribute must be empty (value=""). This is what makes it a trap: a real visitor submits it empty, a bot fills it in. - The
type="hidden"attribute keeps it completely invisible to your visitors — no CSS tricks needed.
EchoBrain automatically strips the _honeypot field from all stored submission data, so it will never appear in your submissions list regardless of whether a submission was flagged.
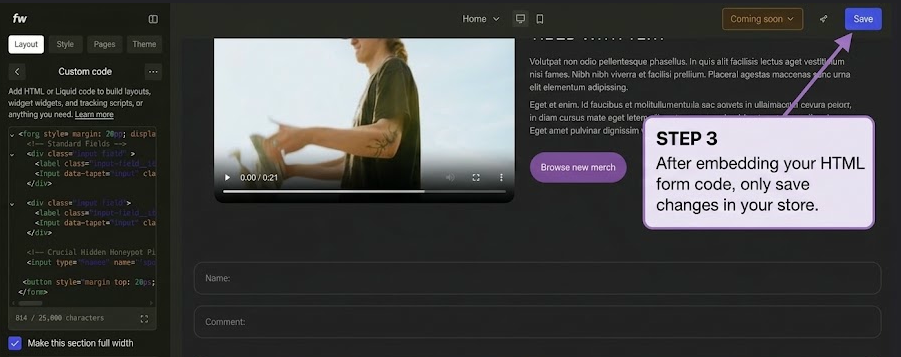
Step 3: Add the Form to Your Fourthwall Site
If you’re embedding this form on a Fourthwall page, paste the updated HTML (with the honeypot field included) into your Custom Code section:
- Log in to your Fourthwall dashboard.
- Go to Site Design in the left-side menu.
- Locate the page section containing your form’s Custom HTML and click on it to edit.
- Make sure the
<input type="hidden" name="_honeypot" value="">line is present inside your<form>element. - Click Save to publish your changes.
Automatic Rate Limiting — No Setup Required
In addition to the honeypot, all EchoBrain forms are automatically protected by IP-based rate limiting — no configuration needed on your end. Each IP address is limited to 10 submissions per hour per form. Requests that exceed that limit receive a 429 Too Many Requests response before any data is even processed.
This protects your forms from flood attacks and high-volume bots, independently of whichever spam protection option you choose.
Conclusion
Honeypot protection is the simplest spam filter EchoBrain offers — one hidden field in your HTML, no external accounts, no user-facing challenges. Combined with the automatic rate limiting that runs on every form, your submissions stay clean with minimal setup.
If you haven’t created your form yet, check out our custom forms guide to get started. If you prefer a challenge-based protection approach, see our Google reCAPTCHA v2 guide for a step-by-step walkthrough.
Have questions? Reach out to support.
Ready to keep spam out of your inbox? Log in to EchoBrain today and enable Honeypot protection in minutes.