EchoBrain reviews in your Fourthwall shop: Quick Start Guide
EchoBrain makes it simple to collect and display customer reviews on your Fourthwall shop. Follow these steps to display EchoBrain reviews into your store’s design once you have completed the EchoBrain-Fourthwall integration
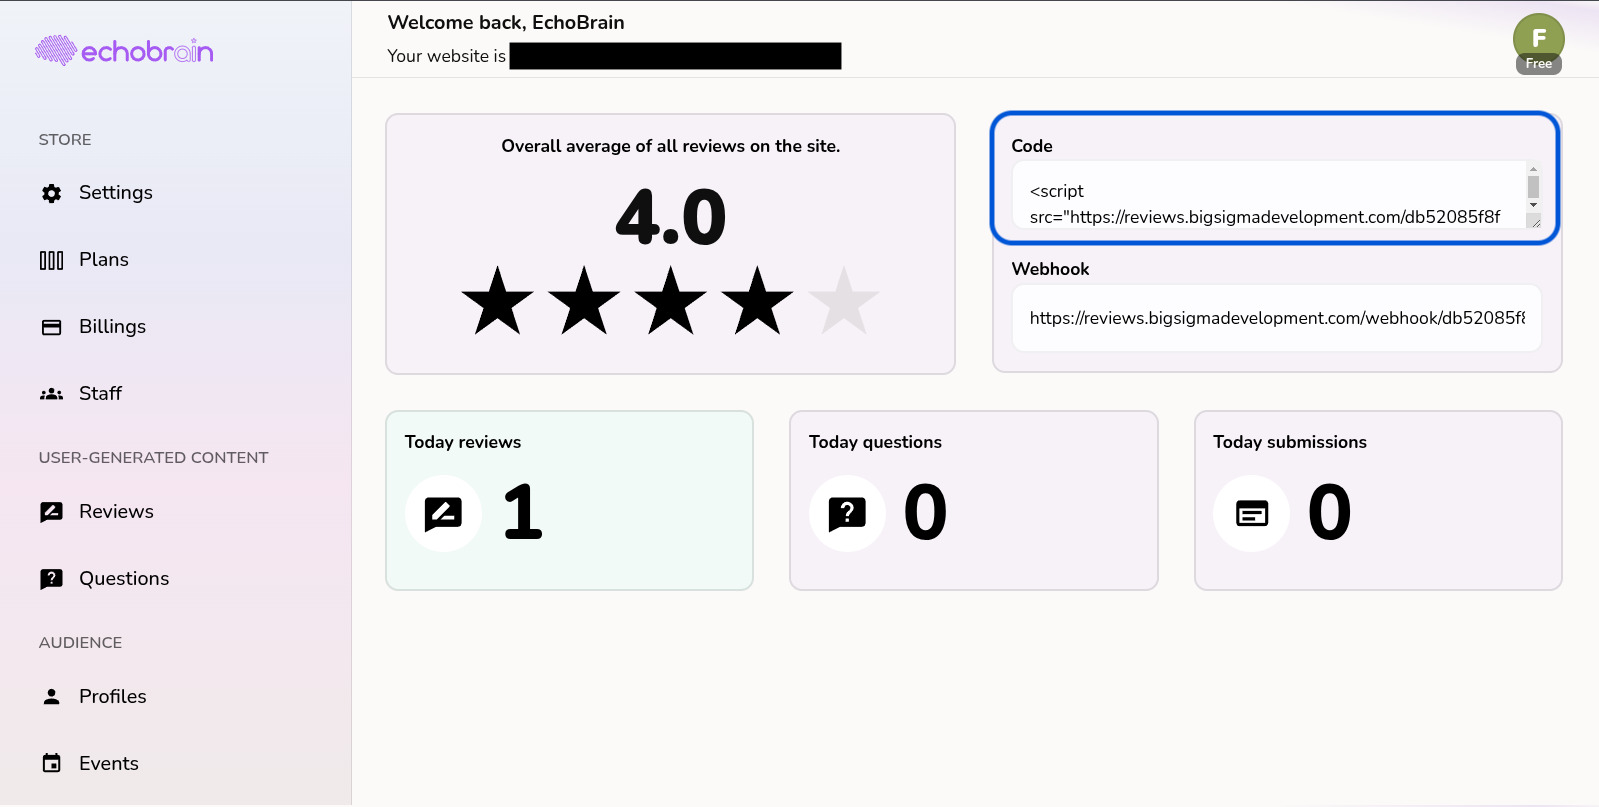
Step 1: Copy Your EchoBrain integration code snippet
- Log in to your EchoBrain dashboard.
- On the home page, locate the section labeled Code.
- Click inside the box to select the code snippet, then copy it.
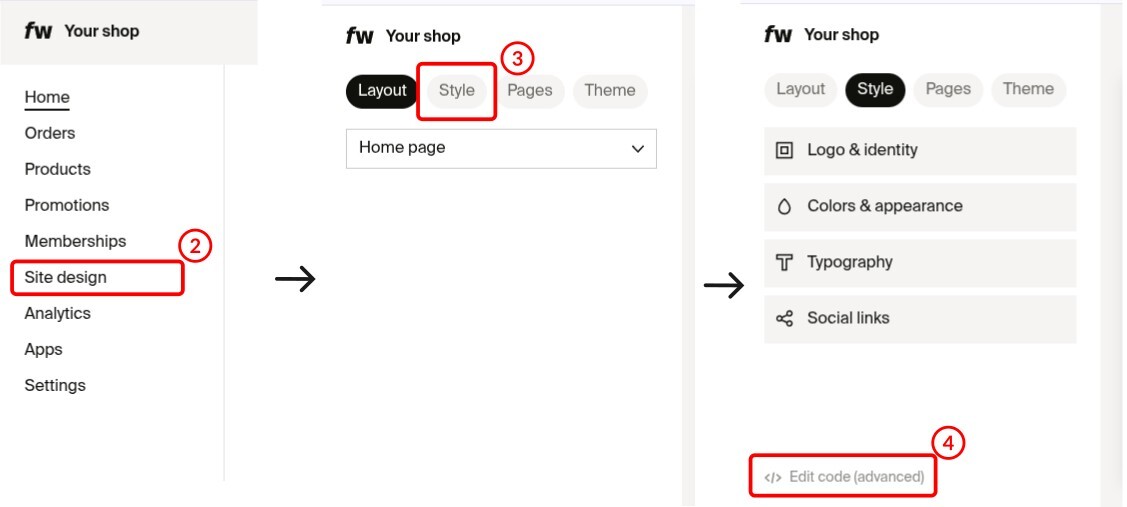
Step 2: Access Your Fourthwall shop Site Designer
- Log in to your Fourthwall shop admin.
- In the side menu, click on Site design.
- Select the “Style” option on the upper left part of the Site Designer.
- Scroll down and select Edit code (advanced).
Step 3: Enable and Insert the Review Code
- Check the box labeled Enable header code.
- In the text box labeled Custom header HTML, paste the EchoBrain review code snippet you copied earlier.

Step 4: Learn about the different EchoBrain review widgets
In EchoBrain, you can currently show 3 types of widgets: Product Review widget, Star Rating badge, and the General Review widget
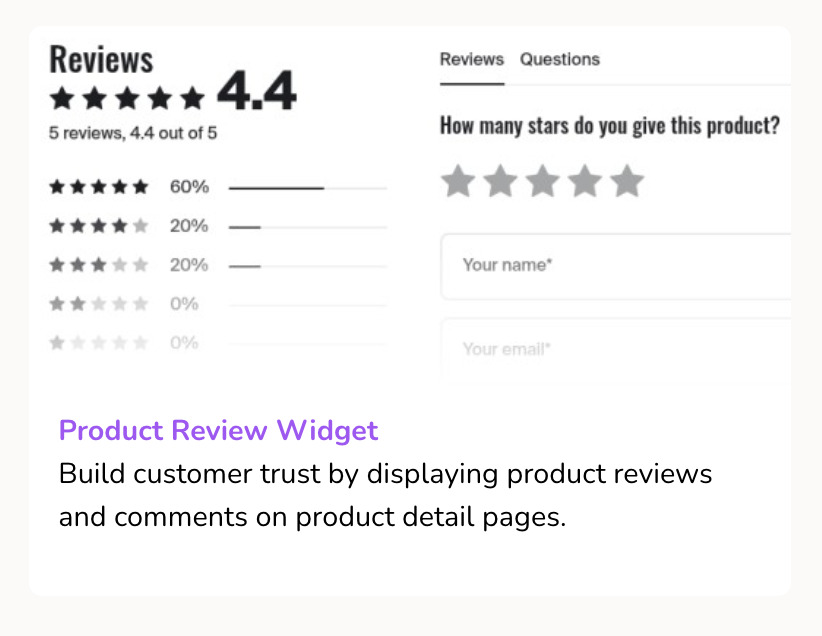
Product Review widget:
This is the widget that is intended to show up in each of your product pages, showcasing the reviews of each your products. It will show a summary of your product star rating, and it will also show details of each review that was published by your team. Click here to learn more about managing your shop’s reviews.
Star rating badge:
This is the widget that shows a summary of the star rating of your product. It is calculated by averaging all the published reviews of your product. Many creators and sellers choose to show this widget below the product title on the product page or somewhere on each tile on a collection page:

![]()
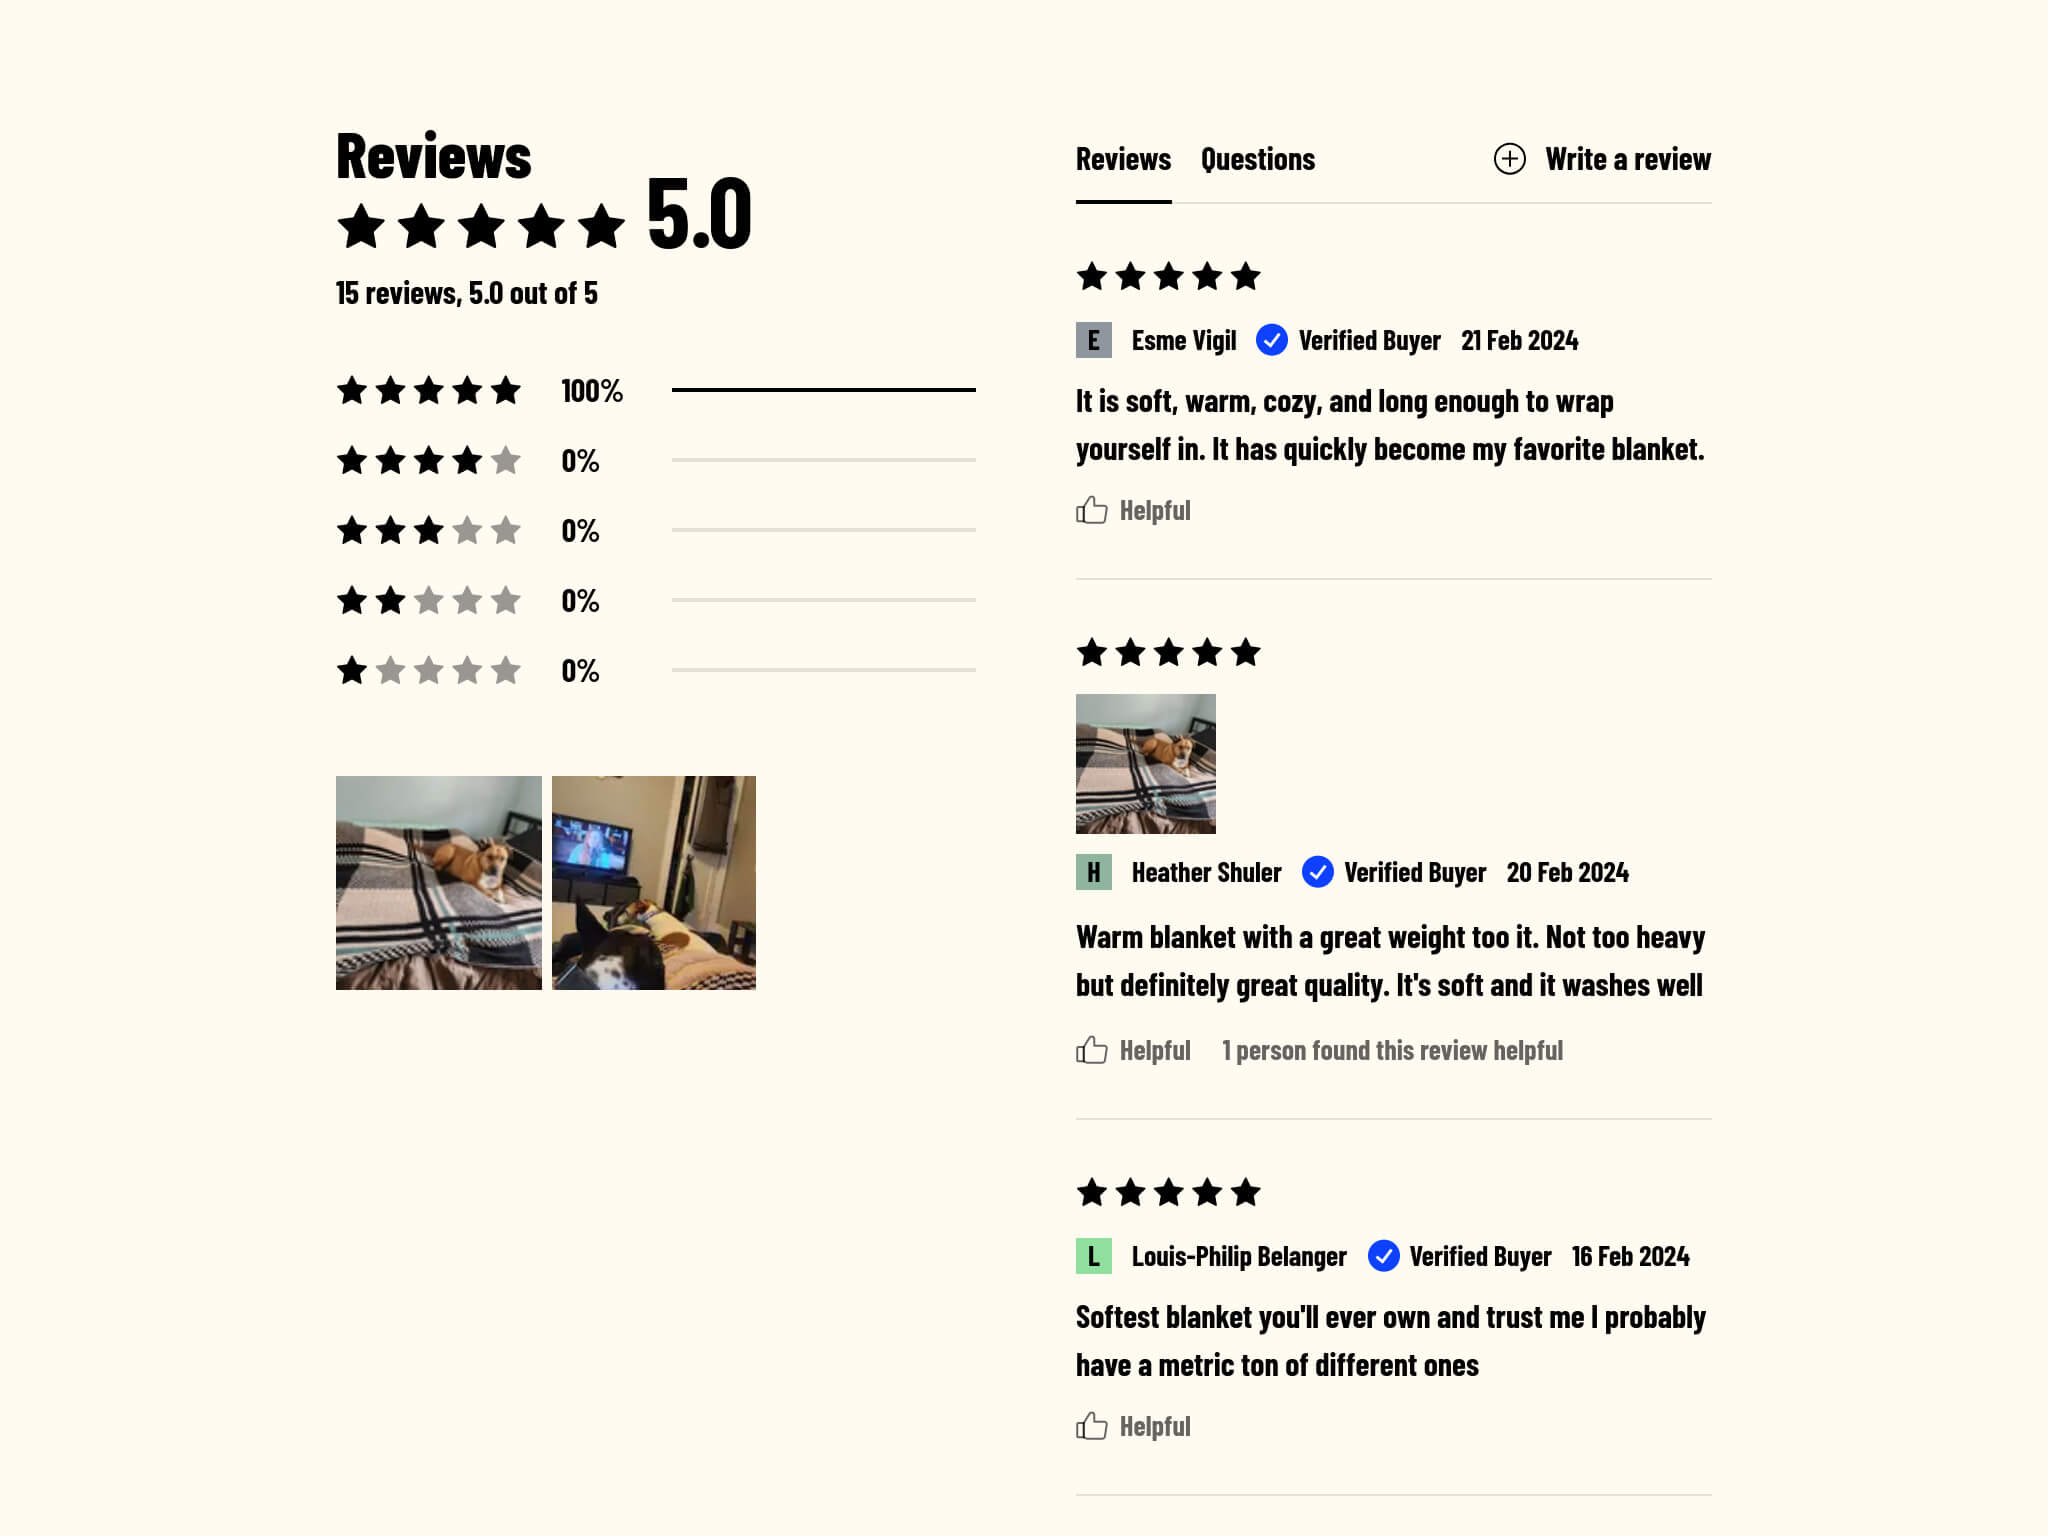
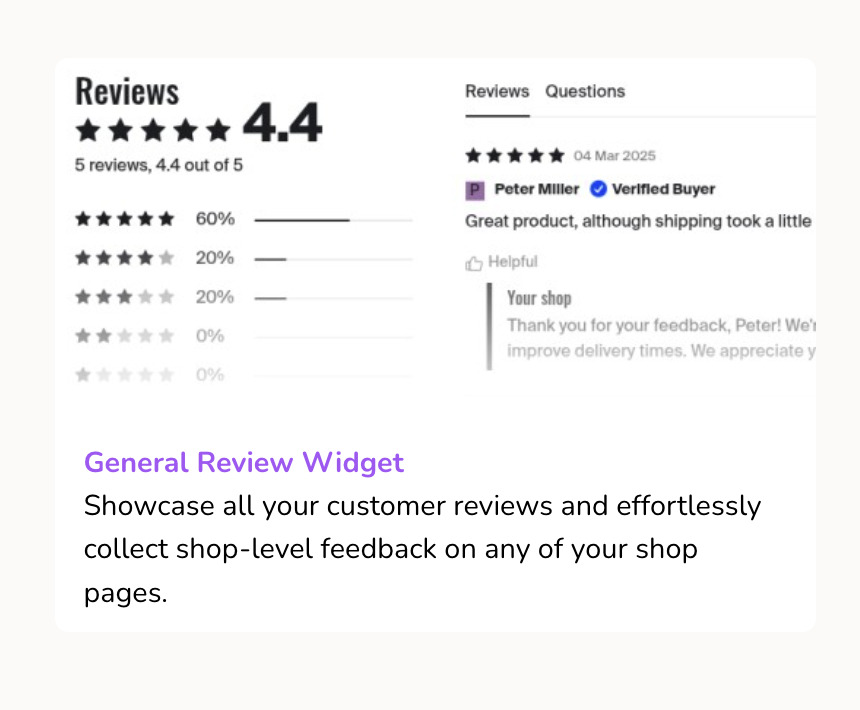
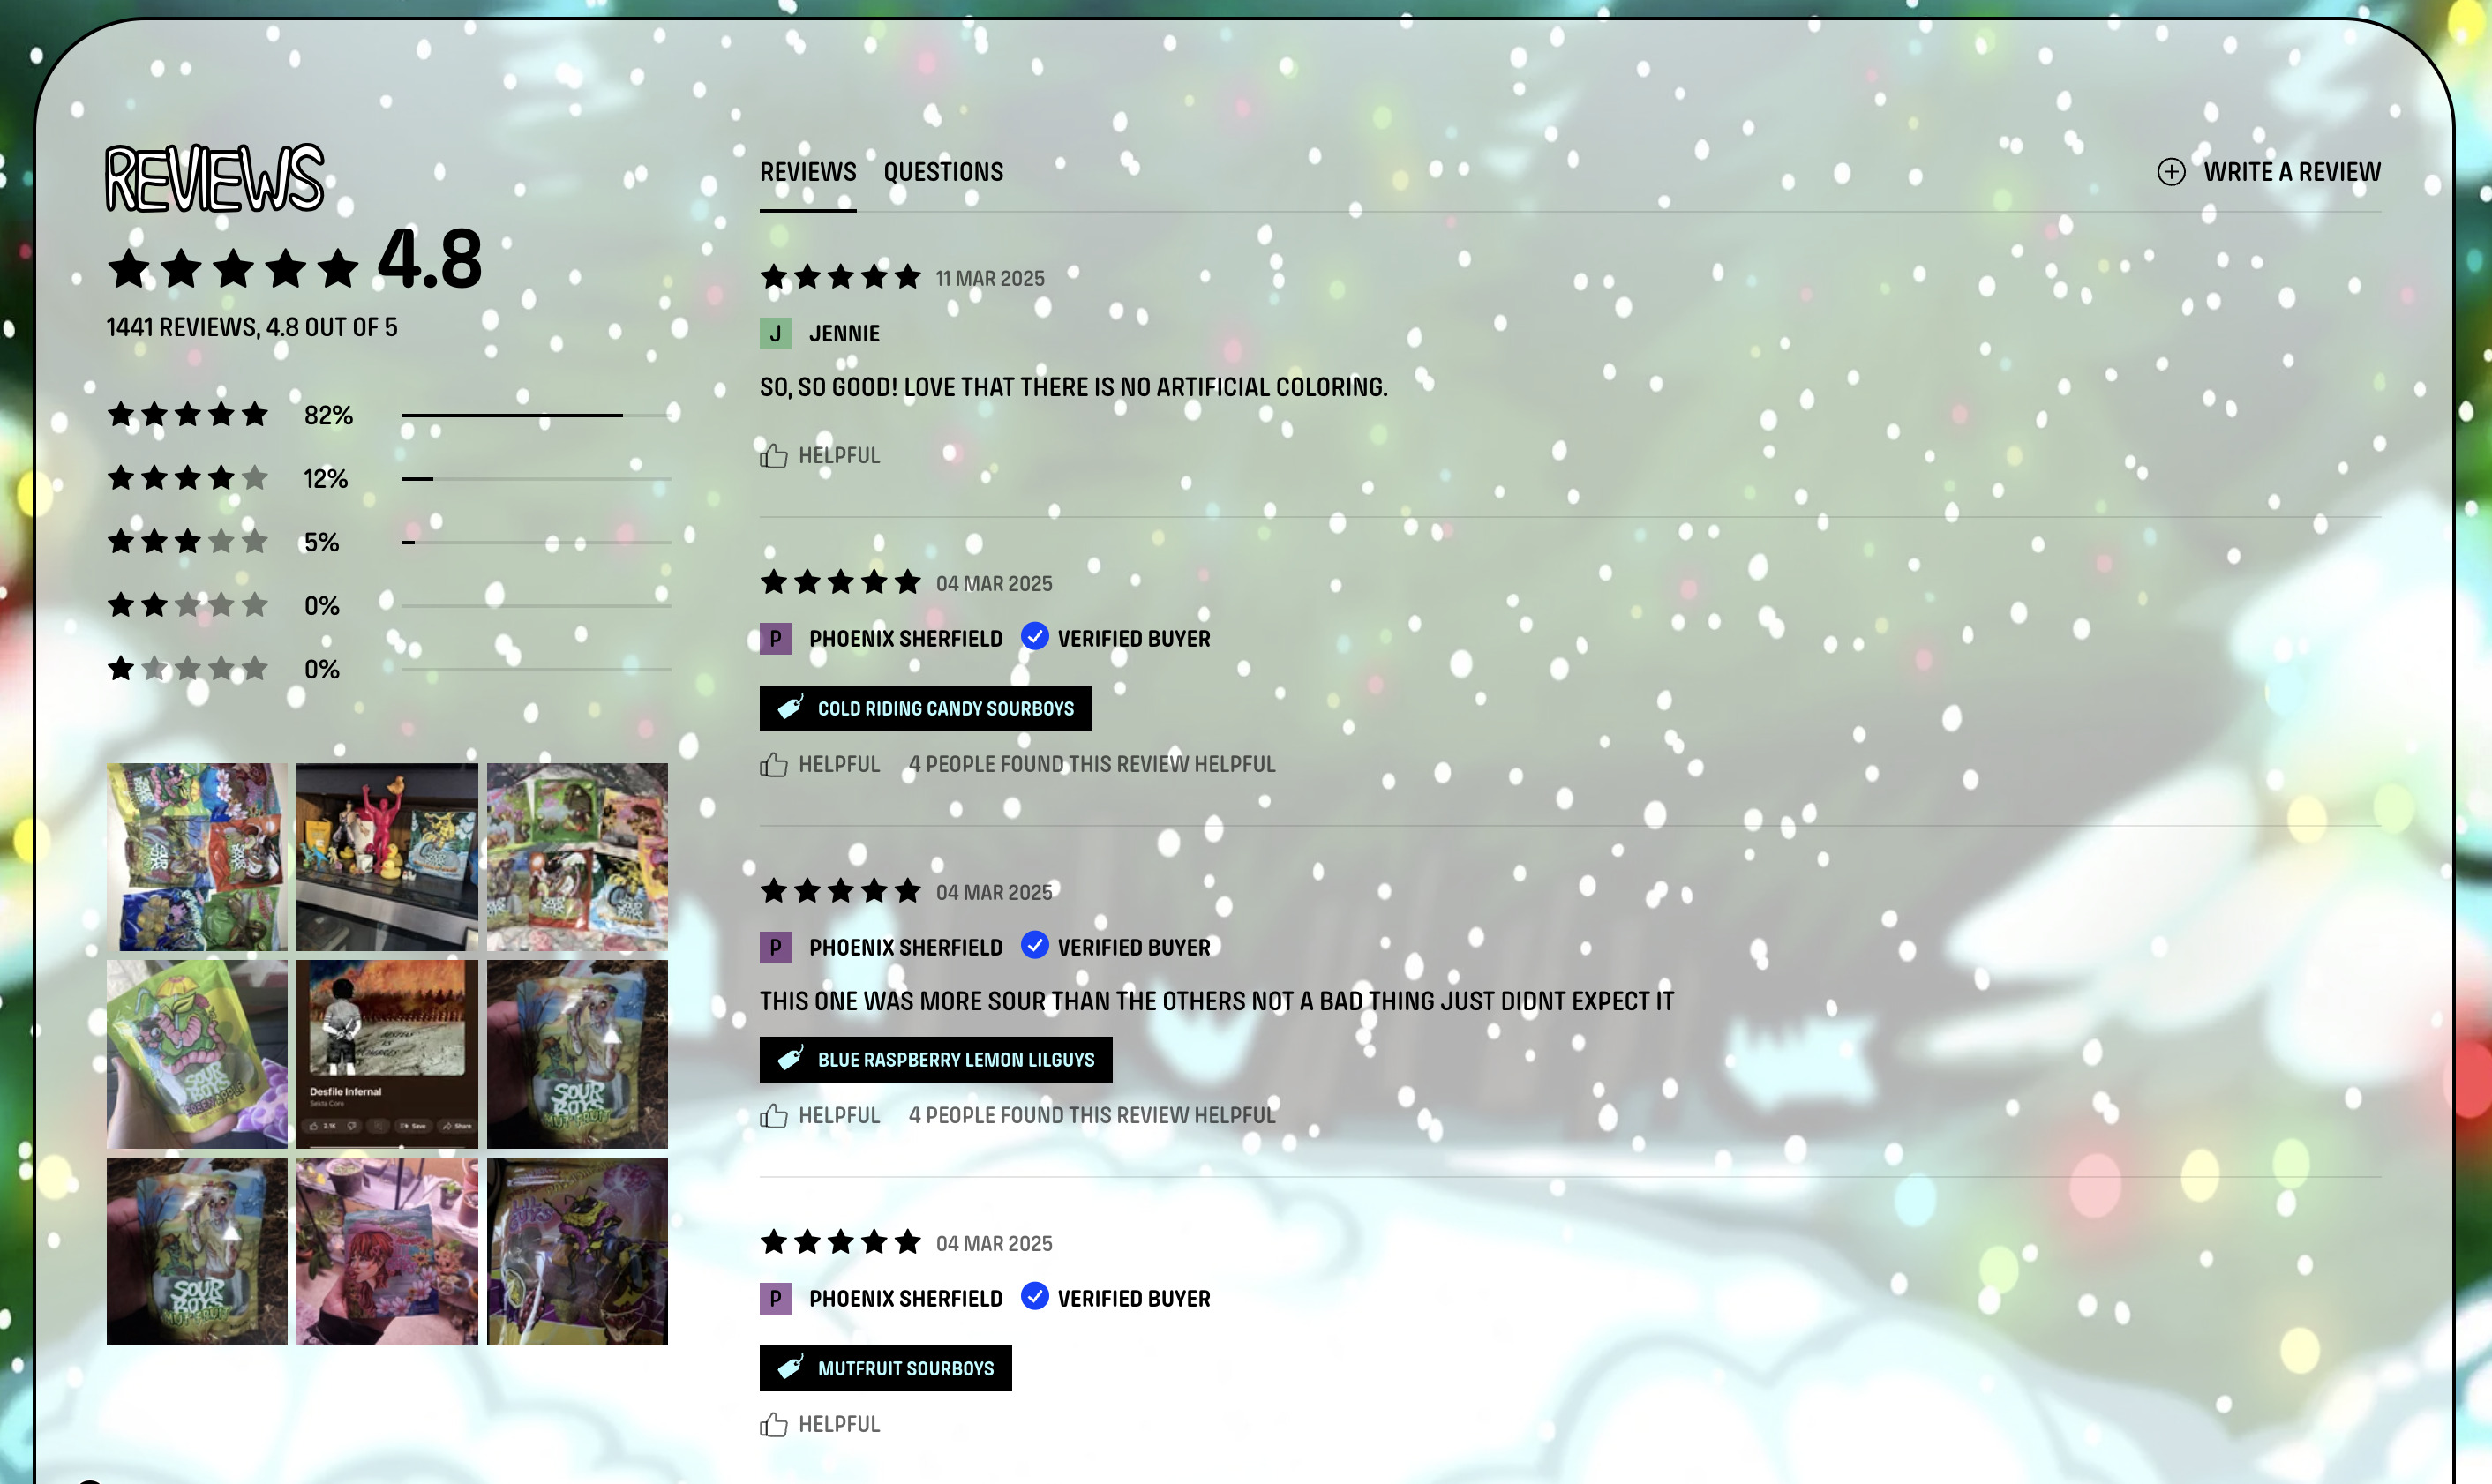
General Review widget:
This widget is designed to show reviews of ALL your product (published reviews). It can be shown on any page of your store (including homepage and product pages). This widget, wherever you decide to display it, will show the same rating average, the same number of widgets, and the same reviews on every place where it is displayed.
Step 5: Showcase Your Review Widgets
Now that you’ve set up your EchoBrain account and integrated it with your shop, it’s time to let your customer reviews shine on your store. This step will guide you through two methods to display the EchoBrain review widgets in your desired locations on your site.
Method 1: Select widget placement on live site (No Code, Recommended)
For each widget EchoBrain offers, you can enable it by going into the configuration of each widget in your EchoBrain dashboard, and clicking the “Display widget” checkbox. Then, you can do the following:
1. Click on the “Select placement on live site” button: Log in to your EchoBrain dashboard and click on the “Widgets” link under “REVIEWS” on the sidebar menu. Then, click on the Widget you want to edit the settings for. Under “PLACEMENT”, click on the “Select placement on live site” button, and this will take you to a view of your live site with a little difference: you will be able to move your mouse over different sections of your site and select where you want your review widget to show up.
Note: If you are logged into your Fourthwall shop dashboard in another tab, and you click on the “Select placement on live site” and you are not able to select where to place your widget, it’s likely that the EchoBrain script you added to your theme on your Fourthwall’s Site Designer might not be working correctly. If this happens, please contact us at info@echo-brain.com.
2. Make your placement selection: Once you click the button, you will be taken to a view of your live site. Depending on the widget you are configuring, you will be able to select the placemement of your widget on different pages of your site. For example, if you are configuring the “Product Reviews widget”, you will only be able to select the placement on a sample product page. Once you make the selection, the widget will be shown in that place on all of your shop’s product pages. On the other hand, if you are configuring the “General Reviews widget”, you will be able to select the placement on any page of your shop.
3. Save Your Configuration: Once you make the selection, click on Save to go back to your EchoBrain dashboard to continue the configuration of your widget.
For a more detailed explanation of how this method works, please visit this article.
Method 2: Adding HTML Placeholders (Only if you are not able to make Method 1 work)
You can also manually add empty HTML placeholders within your theme code, if you have access to it. These placehodlers act as designated spots where EchoBrain will insert the reviews widget. You can also ask the development team to add them for you. Here’s how to do it:
1. Identify the areas: Identify the areas where you want the reviews widgets to appear, such as below the main product section. Add an empty HTML placeholder like the ones shown below. If you don’t have access to make this code change yourself, contact support to have Fourthwall’s developer team do it for you and add the placeholders in the areas that you have identified. The HTML placeholders for the currently available widgets look like the following:
General Review widget: (widget that shows ALL your reviews)
<div data-reviews="general_review_widget"></div>
Product Review widget: (widget that shows reviews belonging to one specific product)
<div data-reviews="review_widget"></div>
Star rating badge (to show rating average and stars):
<div data-reviews-summary="{{ product.id }}"></div>
2. Save Changes: Save the changes to your theme code. EchoBrain’s script will automatically detect these placeholders and populate them with the review widgets.
Step 6: Repeat Step 5 for each review widget you want to display
You can set the placement for each widget you want to display. To hide/disable a widget, you just need to make sure the “Display widget” checkbox is unchecked for that specific widget you want to hide/disable.
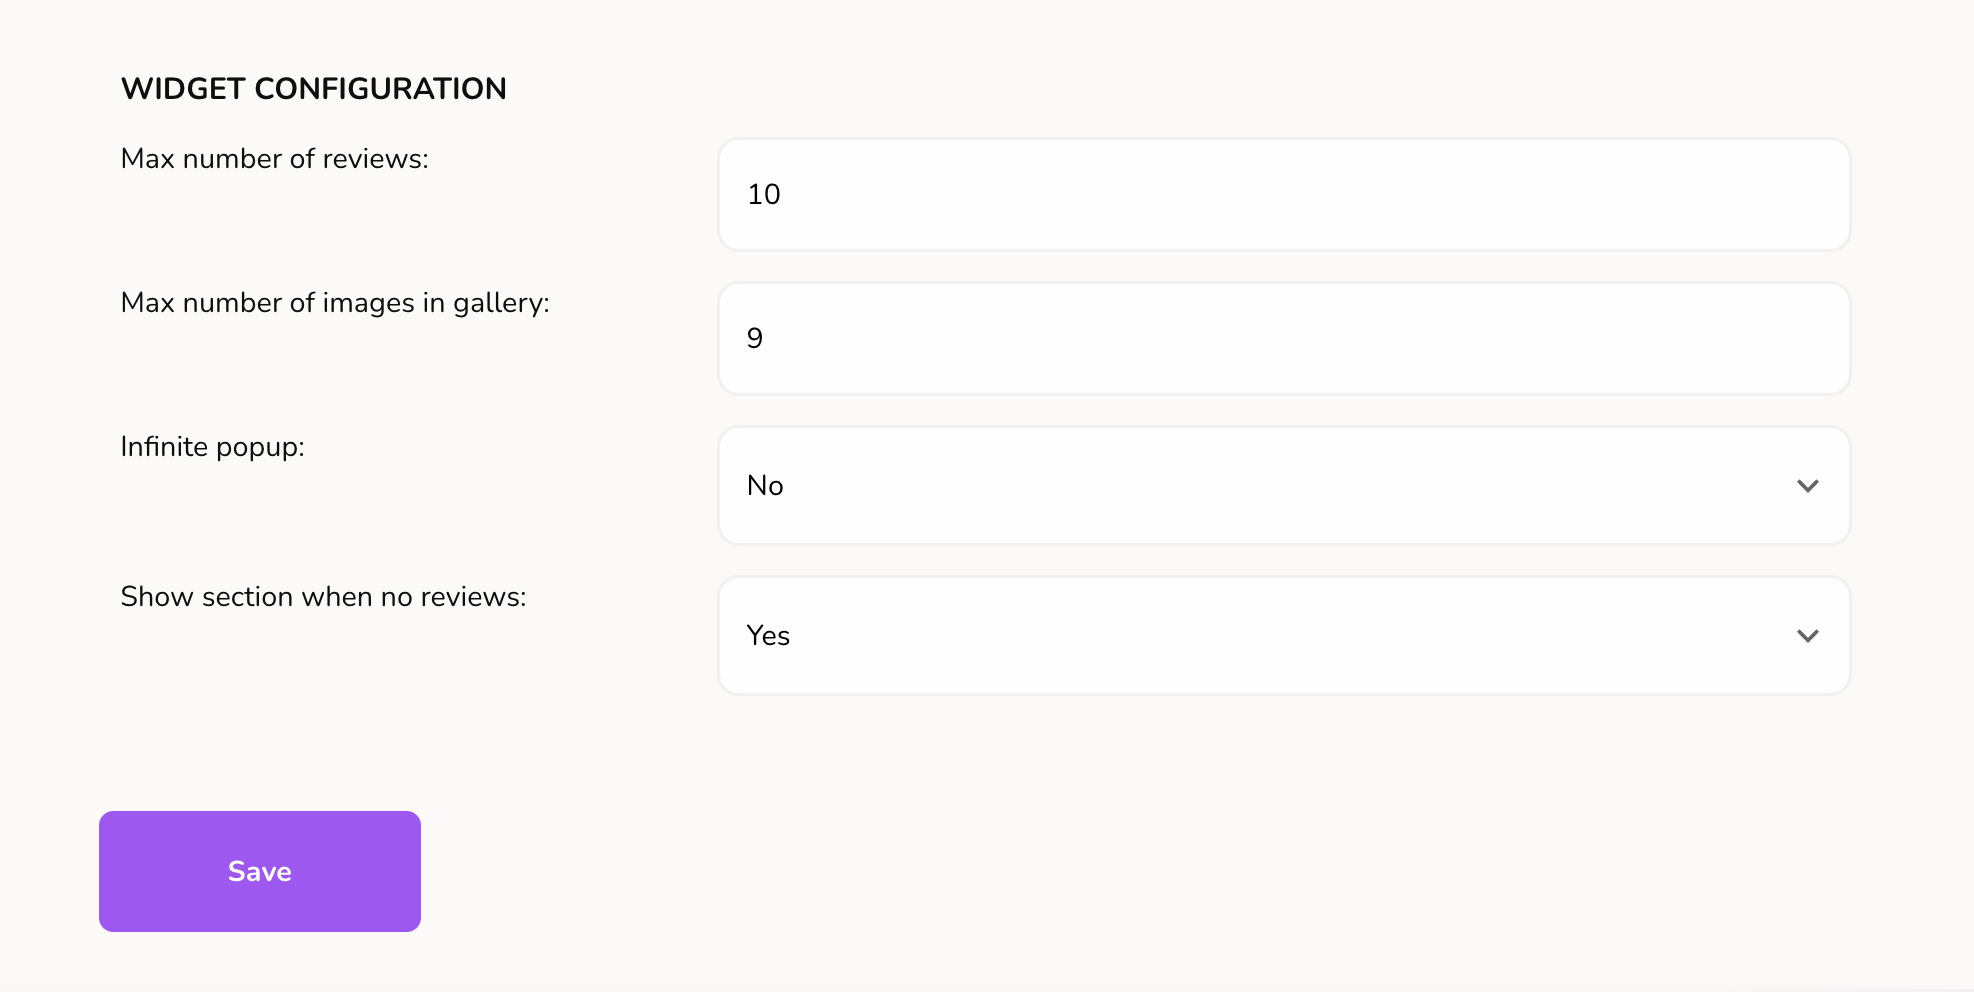
Within the configuration of each widget, you can also edit the following settings (depending on the nature of each widget):
- Max number of reviews: Maximum number of reviews to show per page
- Max number of images in gallery: Maximum number of images to show in the gallery of the product review and general review widgets
- Infinite popup: When a visitor clicks an image in the gallery of the product review or general review widget, a popup comes up, showing the reviews in the form of a carousel. This setting set the carousel to one that infinitely loops around all the reviews, as opposed to going from the first one to the last one.
- Show section when no reviews: Whether to show or not the widget when there are no reviews to show.
Final Steps
After following these steps, visit your store to verify that the review widgets are displaying correctly. If you encounter any issues, the EchoBrain support team is ready to assist you. Congratulations, you’re now ready to showcase your customer reviews and build stronger trust with your audience! By following these steps, you’re ensuring that EchoBrain seamlessly integrates into your store, providing your customers with authentic and engaging reviews exactly where they’re most impactful. Enjoy the enhanced engagement and credibility that EchoBrain brings to your e-commerce journey!
Note
If you have followed all the steps on this guide, and you cannot select where to place your widget, or after adding the EchoBrain script to your site and adding your first review, you don’t see your review widgets show up on your site, it’s likely that the EchoBrain script you added to your theme on your Fourthwall’s Site Designer might not be working correctly. If this happens, please contact us at info@echo-brain.com.
Next Steps
- Click here to learn how to manage the way reviews are displayed/requested on your shop: Edit number of days post-purchase to send review request emails, choose where on your pages to show your reviews, how reviews are displayed, etc.
- Click here to learn how to check the reviews that have been submitted by your customers, reply to them, and publish the ones you want to showcase in your product pages.
- Click here to learn how to manually add your first review while you wait for customers to submit new reviews.
- Click here to learn about how reviews are collected with EchoBrain.