Getting Started with EchoBrain: First Steps
Welcome aboard, creators! Diving into the world of EchoBrain is the first step towards revolutionizing your e-commerce journey. This easy-to-follow guide is designed to walk you through the initial phases of integrating EchoBrain into your online store. With EchoBrain, you’re not just adopting a platform; you’re embracing a community-driven approach to enhance your brand’s authenticity and customer engagement. Let’s embark on this journey together, step by step.
Step 1: Sign Up and Dive In
Your adventure with EchoBrain begins at the very start – registration. Head over to EchoBrain’s registration page to create your account. This is where the transformation of your e-commerce strategy starts. Once registered, you’ll be ushered into your personal EchoBrain dashboard, the command center for your upcoming endeavors.
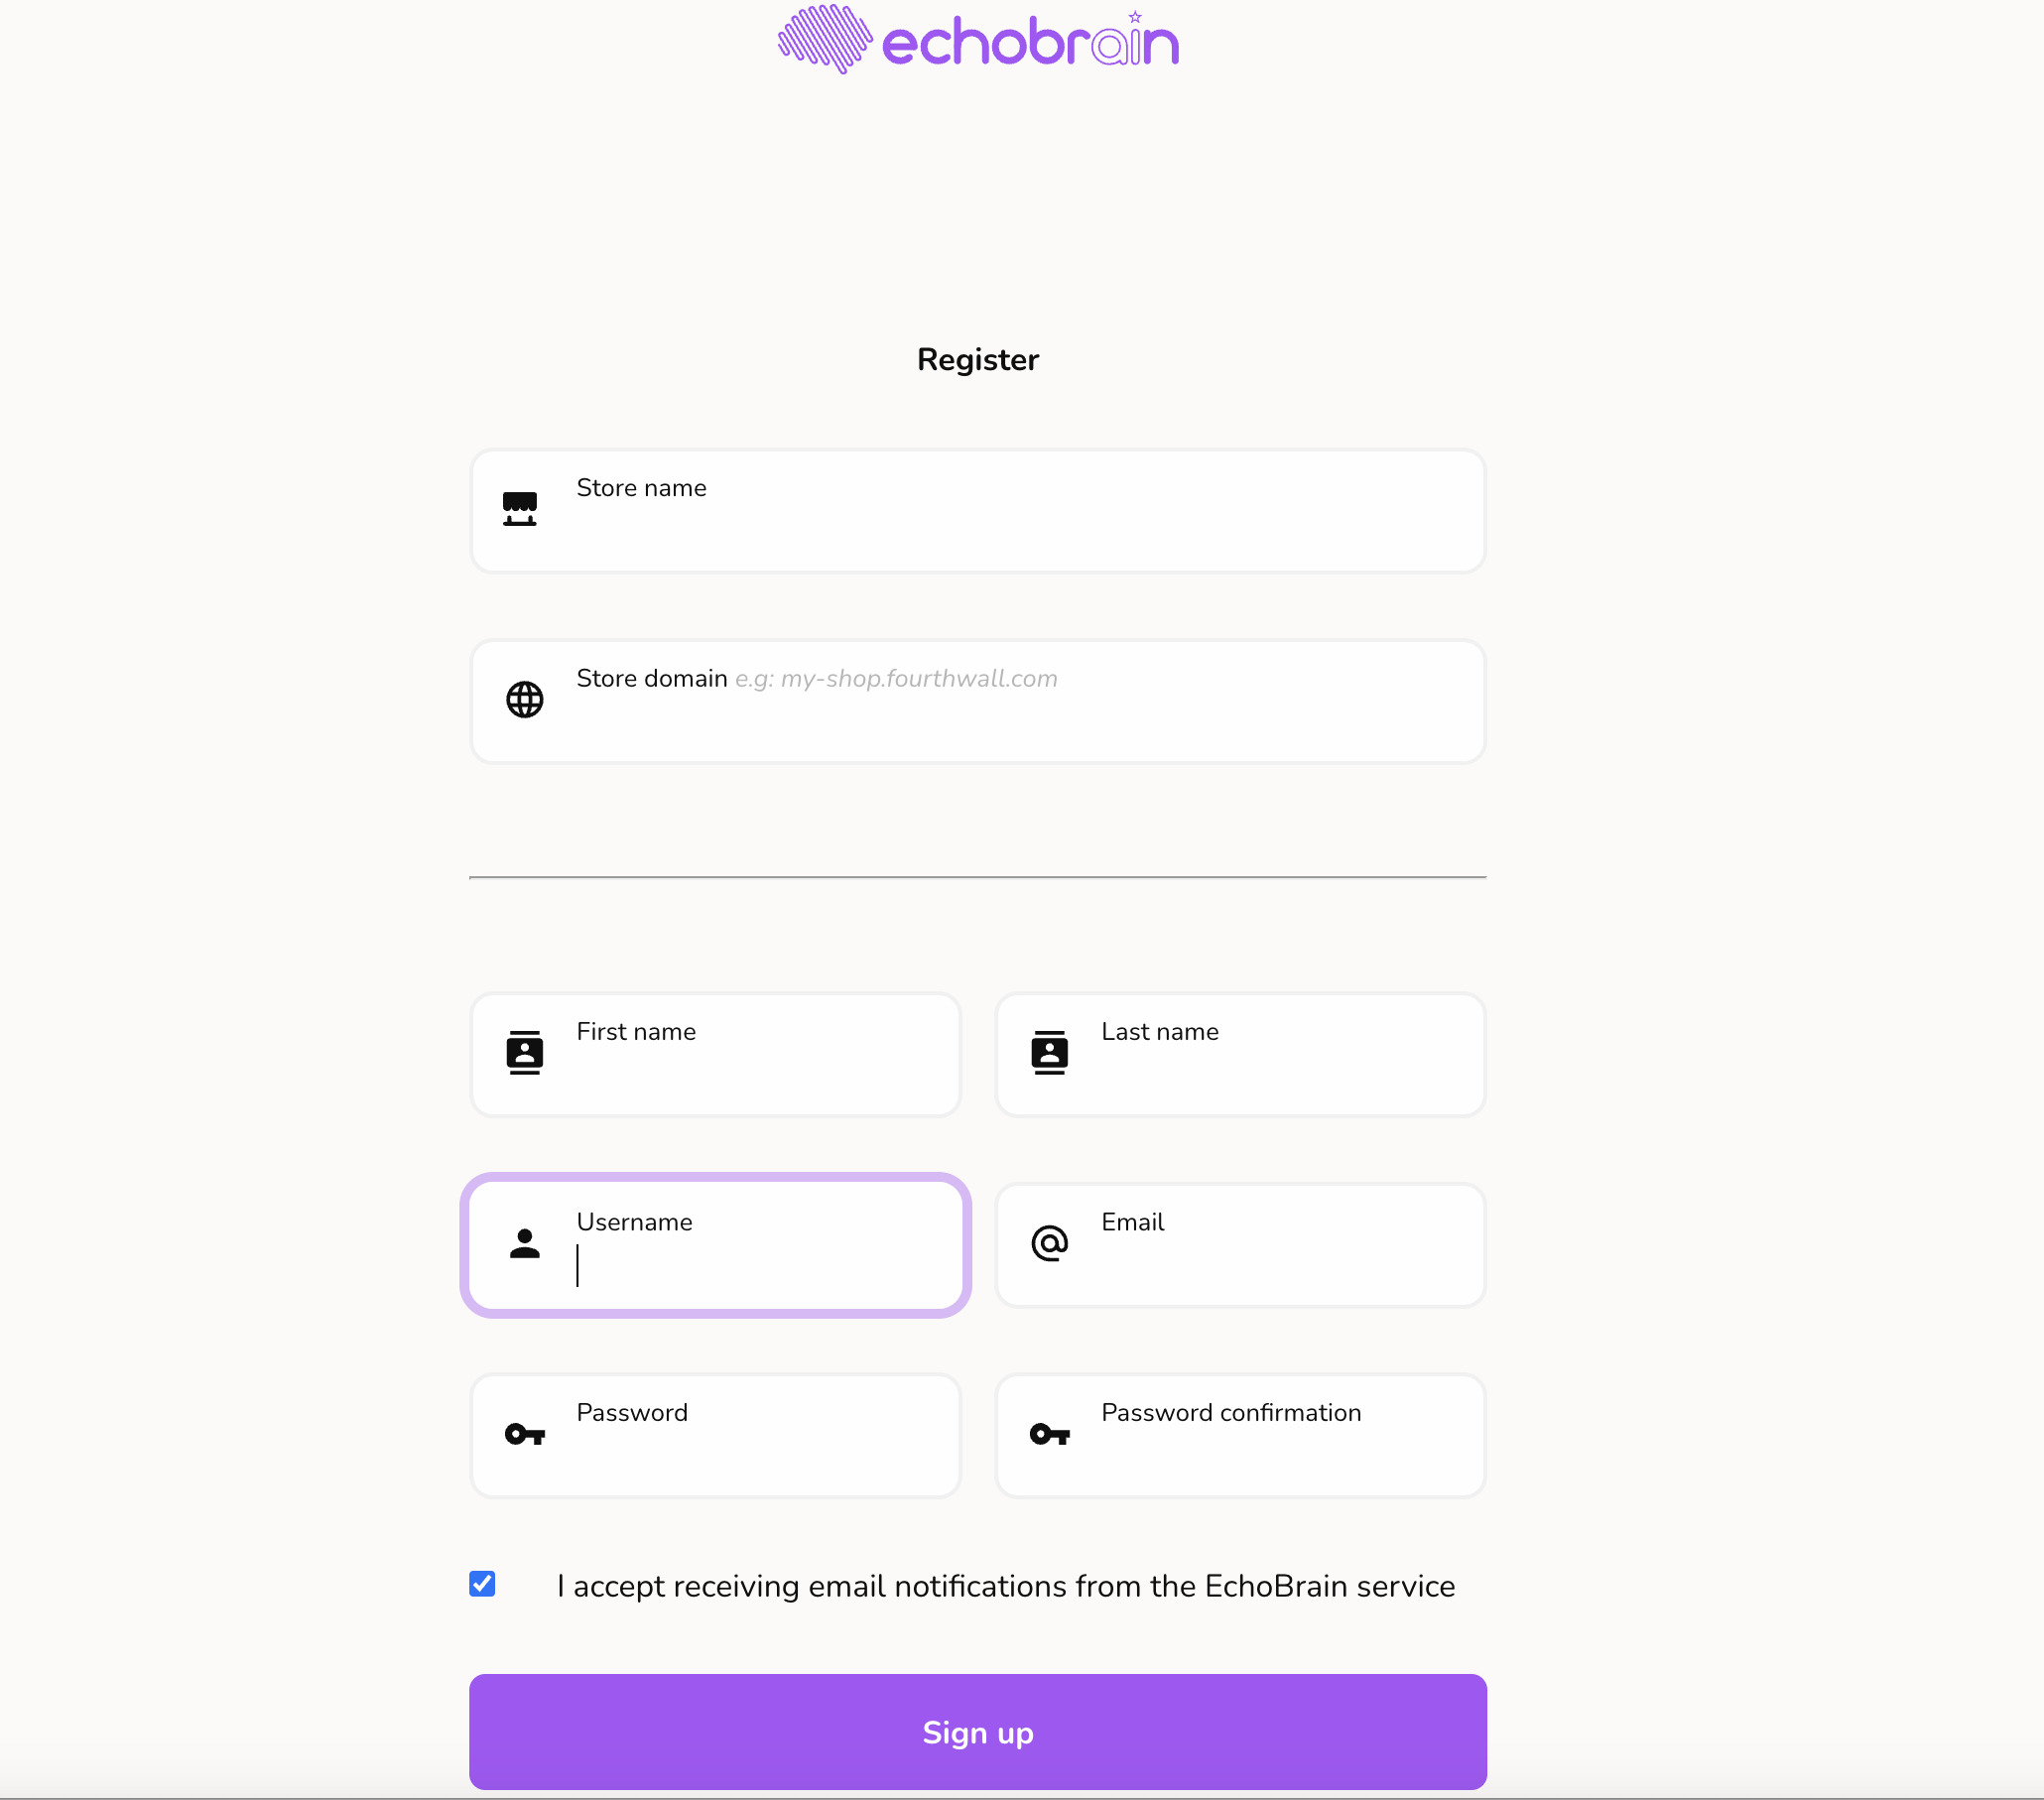
The registration form will ask you for basic information about your store and yourself. About your store, you will need to enter the following information:
- Store name: This is the name of your store. If you are using Fourthwall as your ecommerce platform, the name of your store could be, for example, “Gatilicious Merch”
- Store domain: This is the domain of your store. For example, it could be “gatilicious.com” or your Fourthwall’s shop internal domain, like “gatilicious-shop.fourthwall.com”
The rest of the fields are regarding the person who is going to be the admin of your account. It could be yourself: your first name, your last name, the username you will want to use, your email address, and the password you want to use to log into your account.
Step 2: Unlock Your EchoBrain Toolkit
Inside your EchoBrain dashboard lies the key to connecting EchoBrain with your online shop – the Webhook URL and the script to include in your shop. Navigate to your account admin homepage to find these crucial pieces of information. Look for “Webhook” or “Code” on the admin homepage. First, click on the “Webhook” field, and copy and save that URL.

Then, click on “Code”, and copy and save the HTML there.

These are the Webhook URL that you’ll need to include in your shop’s settings in Step 3 and the HTML code you will need to include in your shop’s code in Step 4. This process is designed to be straightforward and hassle-free, ensuring you can quickly move on to the exciting part: integration and customization.
Step 3: Integrate EchoBrain with Your Shop
Now, it’s time to bridge your shop with EchoBrain.
If you’re using Fourthwall as your shop’s platform, login into your shop’s admin. Then, click on “Settings” on the left-hand sidebar, and then on “For developers”.
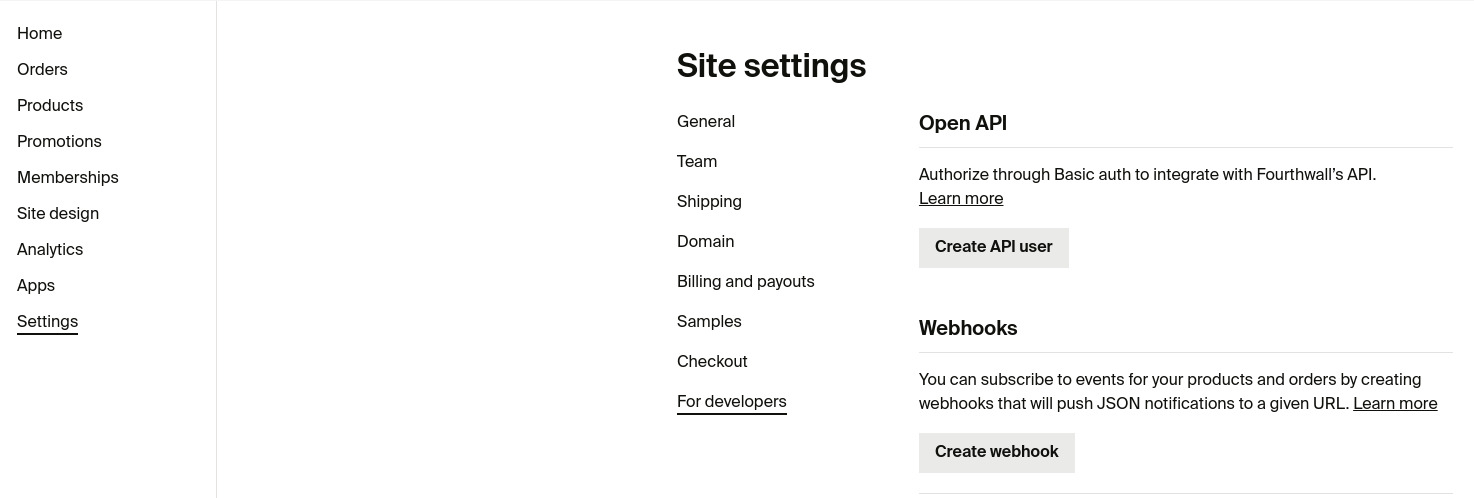
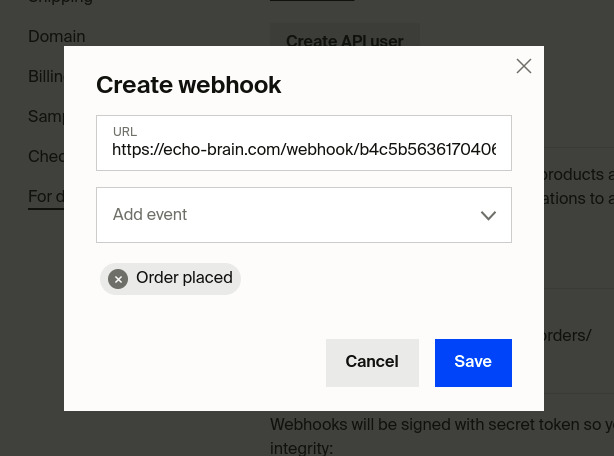
After that, in the “Webhooks” section, click on “Create webhook”; then, on the “Add event” combobox, select “Order placed”, and on the “URL” combobox, paste the Webhook URL you copied in Step 2.
If you’re using another platform, locate the EchoBrain app within your shop’s dashboard and input the information you retrieved earlier. Connecting EchoBrain is as simple as clicking “Connect”. This seamless integration is the first step in bringing the power of customer reviews and social proof to your storefront.
Step 4: Include EchoBrain’s script in your theme
EchoBrain doesn’t just collect reviews; it transforms them into an integral part of your brand’s narrative. Through your Fourthwall shop’s Theme Editor, you can inject EchoBrain’s script to start the magic. This script is more than just code; it’s the gateway to displaying authentic customer reviews, complete with images and ratings, right on your product pages.
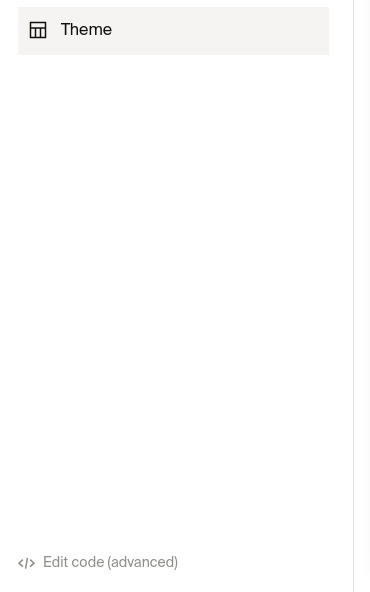
So, go into your Fourthwall shop’s Theme Editor by going to your shop’s admin and clicking on “Site design”.
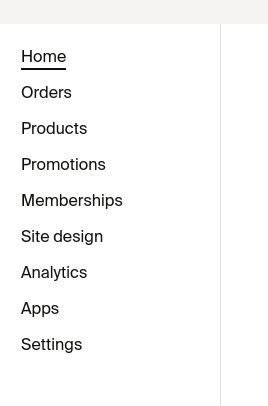
Then, click on “Edit code (advanced)”.
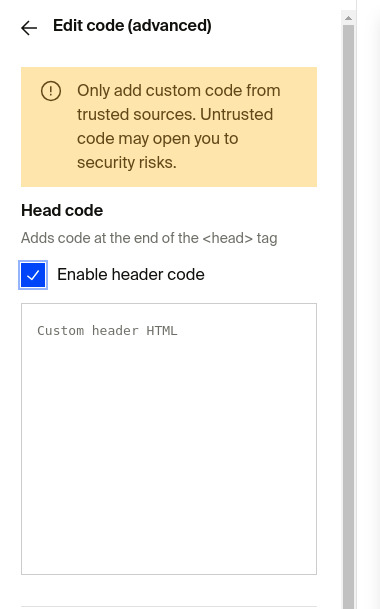
Check the “Enable header code” checkbox, grab the HTML code you copied and saved in Step 2, and insert it into the textbox area that says “custom header HTML”.
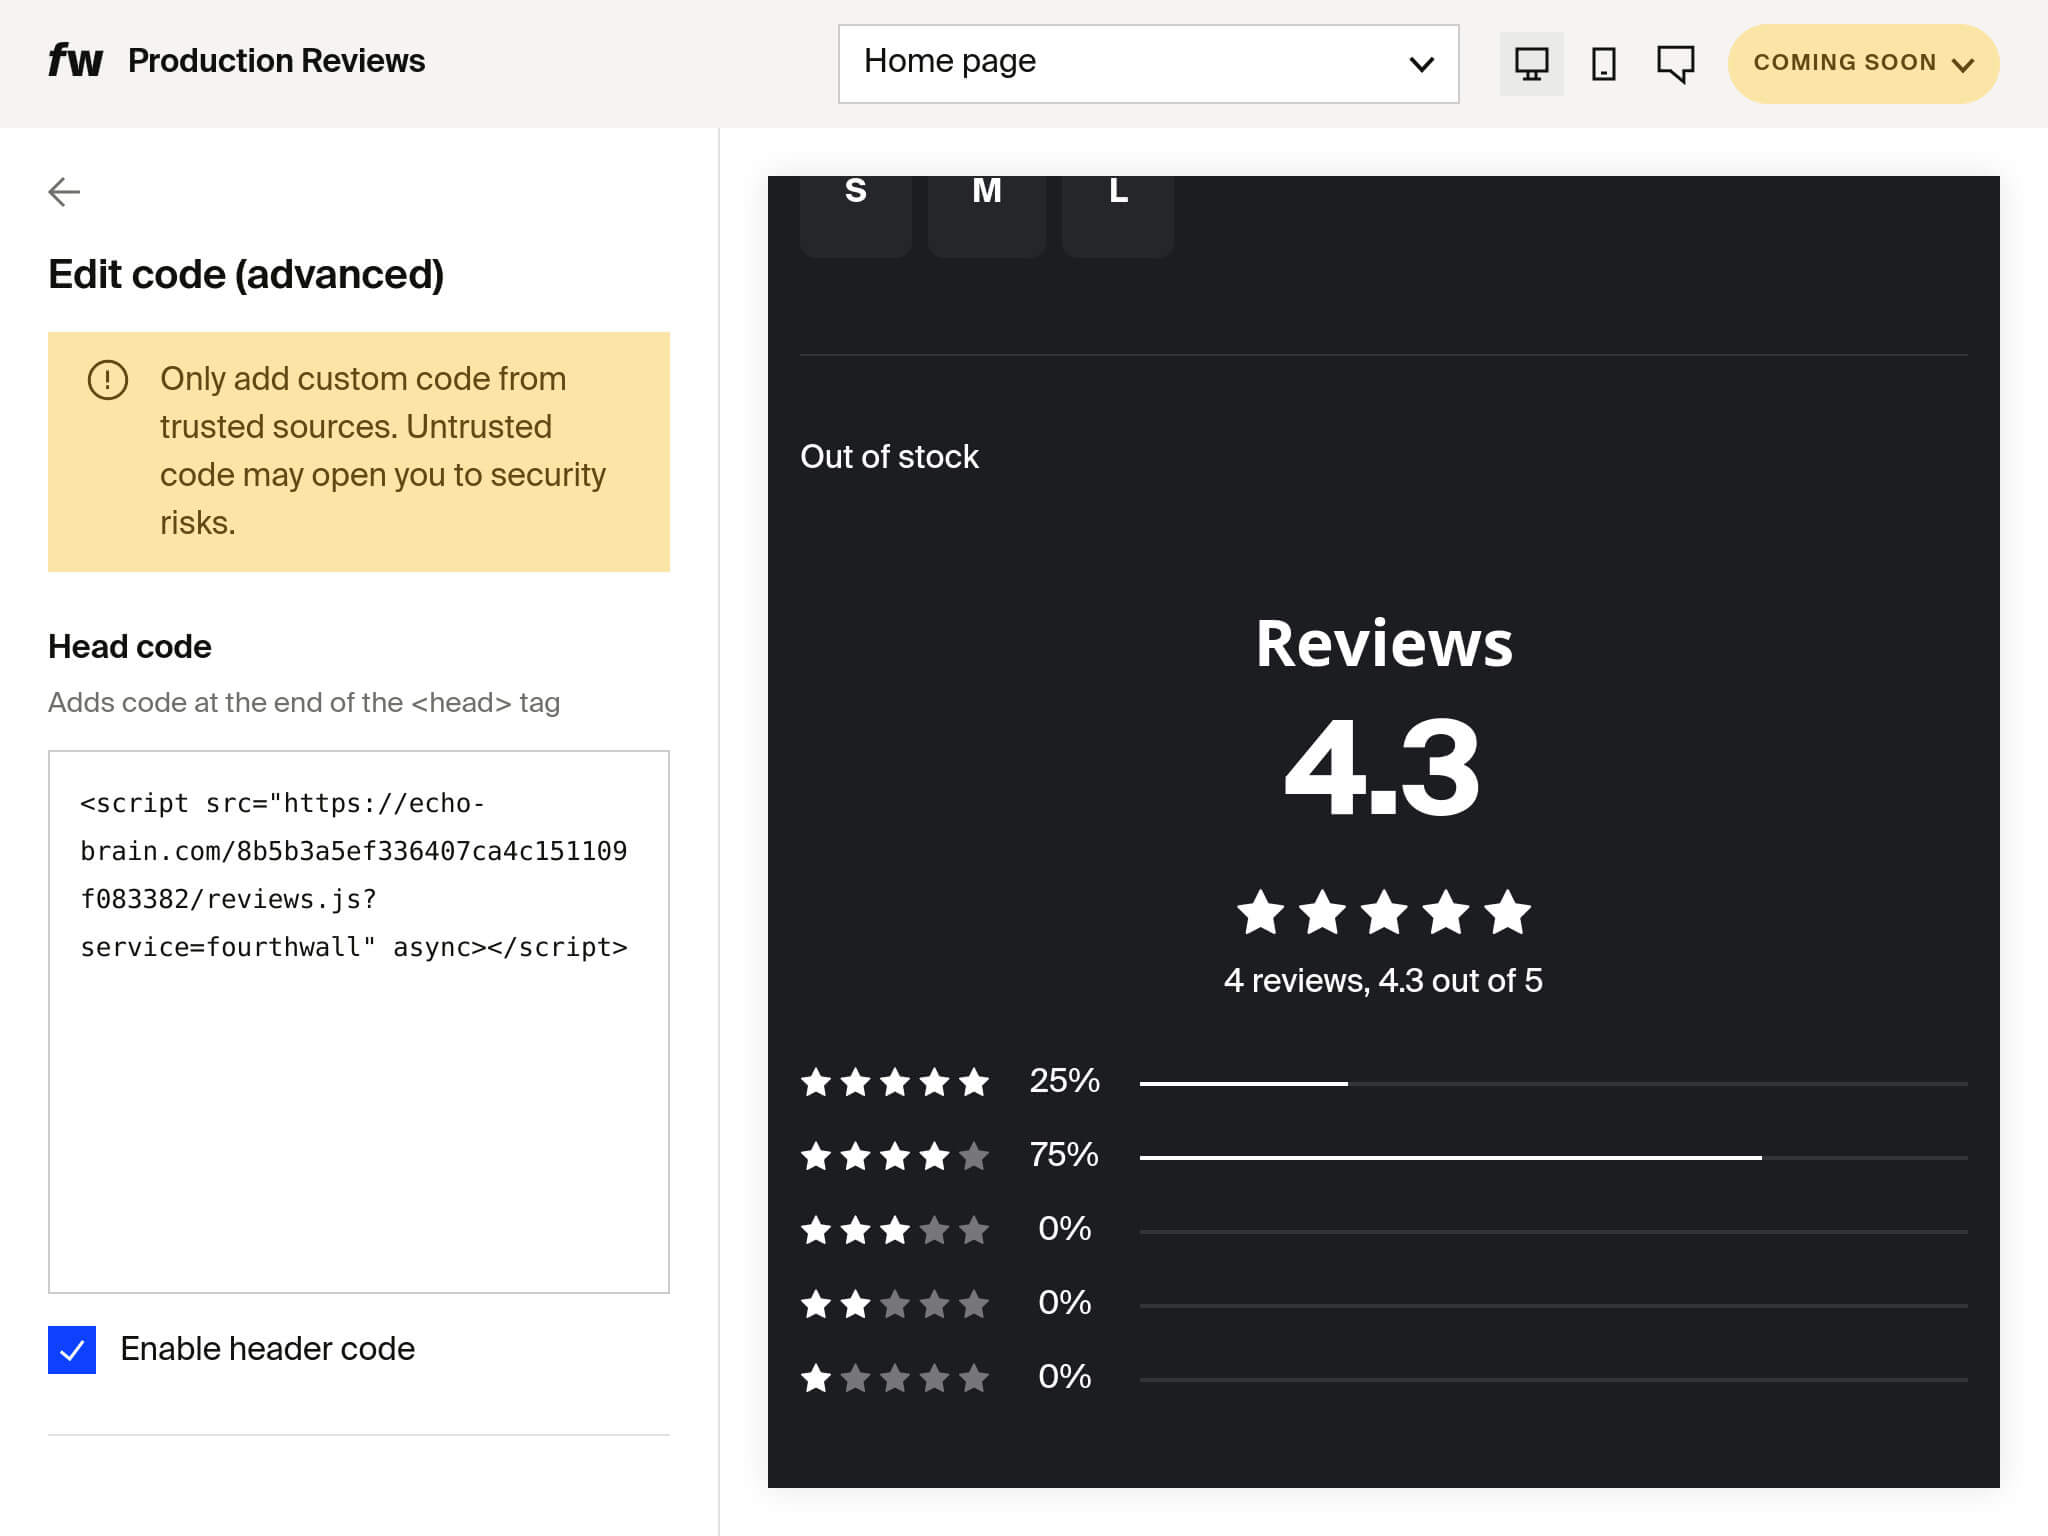
But EchoBrain’s customization capabilities don’t end there. Dive into your EchoBrain dashboard to personalize everything from the aesthetic of published reviews to the strategic placement of these testimonials on your site. EchoBrain ensures that every review not only looks like a natural part of your store but also enhances the shopper’s journey. For a good overview of the personalization you can achieve in your EchoBrain dashboard, click here.
Step 5: Showcase Your Reviews Widget
Now that you’ve set up your EchoBrain account and integrated it with your shop, it’s time to let your customer reviews shine on your store. This step will guide you through two methods to display the EchoBrain reviews widget in your desired locations on your site.
Method 1: Adding HTML Placeholders
To begin with, you can manually add empty HTML placeholders within your theme code. These placehodlers act as designated spots where EchoBrain will insert the reviews widget. Here’s how to do it:
1. Identify the areas: Identify the areas where you want the reviews widgets to appear, such as below the main product section. Add an empty HTML placeholder like the ones shown below. If you don’t have access to make this code change yourself, contact support to have Fourthwall’s developer team do it for you and add the placeholders in the areas that you have identified. The HTML placeholders for the currently available widgets look like the following:
Main Reviews widget:
 <div data-reviews="container">
    <script type="application/json" data-reviews="json">
        {
          "product_id": "{ product.id }",
          "product_title": "{ product.title }",
          "product_image": "{ product.images[0].src | img_url: '720x' }",
          "product_url": "{ product.url }"
        }
    </script>
</div>
One of the most important things when you add the above code is for you to include the data-reviews="container" attribute.
Ratings summary widget (to show rating average and stars):
<div data-reviews-summary="{ product.id }"></div>
2. Save Changes: Save the changes to your theme code. EchoBrain’s script will automatically detect these placeholders and populate them with the review widgets.
Method 2: Using CSS Selectors
If you prefer a more dynamic approach, you can enable the “CSS selectors” feature in the EchoBrain dashboard. This allows you to specify the exact elements on your site after which the reviews widgets will be inserted. Follow these steps:
1. Enable CSS Selectors: Log in to your EchoBrain dashboard and click on the “Settings” link on the sidebar menu. Then scroll down to the “Selectors” section and make sure the “Enable CSS Selectors” checkbox is checked to enable the “CSS selectors feature”.
2. Define Selectors: Specify the CSS selectors corresponding to the elements you want the reviews to follow. For example, if you want the widget to appear after the main product section, you might use a selector like .product-section, or, to be more precise, something like .fw-section > .product-reviews > .container.wrapper > div
3. Save Your Configuration: Save your changes. EchoBrain will now insert each review widget immediately after the elements matched by your CSS selectors.
Final Steps
After applying either method, visit your store to verify that the reviews widgets are displaying correctly. If you encounter any issues, the EchoBrain support team is ready to assist you. Congratulations, you’re now ready to showcase your customer reviews and build stronger trust with your audience! By following these steps, you’re ensuring that EchoBrain seamlessly integrates into your store, providing your customers with authentic and engaging reviews exactly where they’re most impactful. Enjoy the enhanced engagement and credibility that EchoBrain brings to your e-commerce journey!
Embrace the EchoBrain Advantage
Getting started with EchoBrain is more than setting up a platform; it’s about laying the foundation for a more engaged, trustworthy, and customer-centric online store. By integrating EchoBrain, you’re tapping into the collective power of your customer base, transforming their experiences into your brand’s most compelling selling points.
Remember, every review shared through EchoBrain is a testament to your product’s quality and your commitment to customer satisfaction. So, take these first steps with confidence, knowing that EchoBrain is here to support your e-commerce journey every step of the way. Welcome to the EchoBrain family, where every customer’s voice contributes to your brand’s ever-growing story.